
Are you tired of the outdated look of your kitchen cabinets? Perhaps you want to give your kitchen a fresh and modern look without breaking the bank. Painting your kitchen cabinets can be a cost-effective solution to transform your kitchen into a more inviting space. However, painting kitchen cabinets can be a daunting task, especially if you’re not familiar with the process. In this article, we’ll provide a guide to painting kitchen cabinets and give you tips to ensure a successful project.
What You’ll Need:
Before you start your project, it’s essential to gather all the necessary tools and materials. Here’s a list of items you’ll need:
- Screwdriver
- Sandpaper with 220-gritand 320-grit
- Tack cloth
- Paintbrush
- Roller
- Paint tray
- Painter’s tape
- Primer
- Paint
- Protective gear (gloves, safety glasses, mask)
A Guide To Painting Kitchen Cabinets
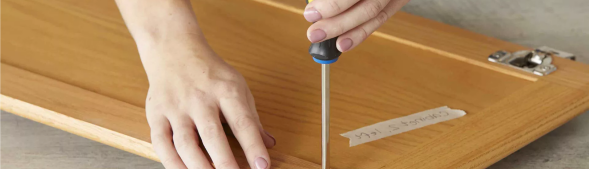
Step 1: Prepare Your Cabinets
The first step in painting your kitchen cabinets is to remove all the hardware, including handles, hinges, and screws. Place them in a safe place to avoid misplacing them.
Next, clean your cabinets thoroughly. Use a mild detergent and warm water to remove any dirt, grime, or grease. Make sure to rinse the cabinets with clean water and let them dry completely.
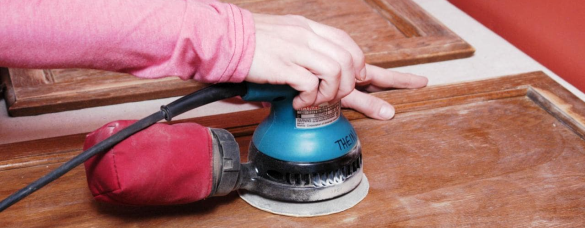
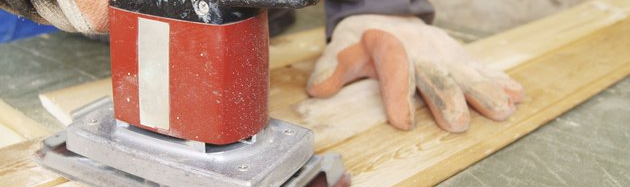
Step 2: Sand Your Cabinets
Sanding your cabinets is crucial to ensure that the primer and paint adhere to the surface. Use a 220-grit sandpaper to sand the cabinets thoroughly. Sand in the direction of the grain and be gentle to avoid scratching the surface. After sanding, use a tack cloth to remove any dust particles.
Next, use a 320-grit sandpaper to smooth out any rough areas on the surface. Sand lightly and use a tack cloth to remove any dust particles.
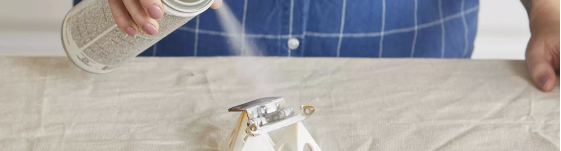
Step 3: Prime Your Cabinets
Priming your cabinets is essential to ensure that the paint adheres well to the surface and to prevent stains from seeping through the paint. Apply a thin coat of primer using a paintbrush or roller. Make sure to cover the entire surface and let the primer dry completely before applying the next coat.
Step 4: Paint Your Cabinets
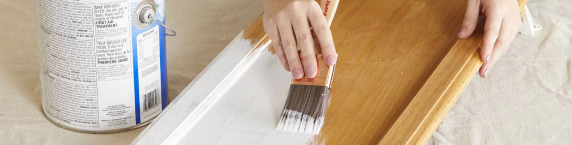
After the primer has dried, it’s time to apply the paint. Choose a high-quality paint that’s specifically designed for kitchen cabinets. You can use a paintbrush or roller to apply the paint. Make sure to apply thin coats and let each coat dry completely before applying the next one.
If you’re using a roller, roll in the direction of the grain, and avoid applying too much pressure. If you’re using a paintbrush, use long strokes and avoid leaving brush marks.
Step 5: Reattach Your Hardware
Once the paint has dried, it’s time to reattach your hardware. Use a screwdriver to attach the hinges, handles, and screws. Make sure that the hardware is secure and in the right position.
Step 6: Finishing Touches
The last step is to add finishing touches to your cabinets. You can use painter’s tape to add a design or pattern to your cabinets. You can also add a clear coat to protect your cabinets from scratches and wear and tear.
Tips for a Successful Project:
Choose the right paint: Make sure to choose a high-quality paint that’s specifically designed for kitchen cabinets. Paints with a satin or semi-gloss finish are ideal for kitchen cabinets as they’re durable and easy to clean.
- Use the right tools:Use a paintbrush or roller that’s specifically designed for the type of paint you’re using. Using the wrong tool can result in a poor finish.
- Sand properly:Sanding your cabinets properly is crucial to ensure that the primer and paint adhere well to the Make sure to use the right grit sandpaper, sand in the direction of the grain, and remove all dust particles using a tack cloth.
- Prime thoroughly: Applying a thin coat of primer is essential to ensure that the paint adheres well to the surface and to prevent stains from seeping through the paint. Make sure to cover the entire surface and let the primer dry completely before applying the next coat.
- Apply thin coats:Applying thin coats of paint is essential to achieve a smooth and even finish. Make sure to let each coat dry completely before applying the next one.
- Consider the drying time:Make sure to read the manufacturer’s instructions to know the drying time for each coat. It’s essential to allow each coat to dry completely before applying the next one.
- Protect your surroundings:Cover your countertops, floors, and other surfaces to protect them from paint spills and drips. You can use painter’s tape to protect your walls and other areas that you don’t want to paint.
What Grit Sandpaper for Cabinets?
When sanding your cabinets, it’s essential to use the right grit sandpaper to ensure that you achieve a smooth surface. Here’s a guide on what grit sandpaper to use for cabinets:
- 220-grit sandpaper:Use 220-grit sandpaper to remove any rough spots, bumps, or splinters on the surface. This grit is ideal for sanding the cabinets before applying the primer.
- 320-grit sandpaper: Use 320-grit sandpaper to smooth out the surface after applying the primer. This grit is ideal for creating a smooth surface for the paint to adhere to.
How to Choose the Right Paint for Kitchen Cabinets?
Choosing the right paint for kitchen cabinets can be overwhelming, as there are many options available in the market. Here are some factors to consider when choosing the right paint for kitchen cabinets:
- Durability:Kitchen cabinets are prone to wear and tear, so it’s essential to choose a paint that’s durable and can withstand daily use. Satin or semi-gloss finishes are ideal for kitchen cabinets as they’re easy to clean and are more durable than flat or matte finishes.
- Color: The color of the paint can significantly impact the overall look of your kitchen. Neutral colors like white, gray, or beige are popular choices for kitchen cabinets as they’re versatile and can complement different decor styles.
- Type of paint:There are different types of paint available in the market, including oil-based and water-based paints. Water-based paints are easy to clean, have low VOCs, and dry faster than oil-based paints. However, oil-based paints are more durable and offer a smoother finish.
Conclusion:
Painting your kitchen cabinets is a cost-effective way to transform your kitchen into a more inviting space. However, it’s essential to follow the right steps and use the right tools and materials to ensure a successful project. Make sure to choose the right paint, sand properly, apply thin coats, and let each coat dry completely before applying the next one. By following these tips, you can achieve a professional-looking finish that will last for years to come.