
Sanding sealer is a vital yet often underappreciated product in the realm of woodworking and finishing. It plays a crucial role in preparing wood surfaces for final finishes, ensuring a smooth, even, and durable result. This article will delve into what sanding sealer is, its benefits, how it differs from other finishes, and the step-by-step process of using it effectively.
What is Sanding Sealer?
Sanding sealer is a clear, fast-drying coating designed to be applied to bare wood before the final finish. It serves as a preparatory layer that seals the wood grain, preventing it from absorbing too much of the subsequent finish. This helps achieve a smoother and more uniform appearance.
Typically, sanding sealers are formulated with ingredients that fill in the wood’s pores and minor imperfections, creating a smooth surface that requires less sanding than raw wood. They are compatible with various types of finishes, including varnishes, lacquers, shellacs, and polyurethanes, making them versatile for different woodworking projects.
Benefits of Using Sanding Sealer
- Enhanced Finish: Sanding sealer provides a smooth, even base for the final finish, enhancing the appearance and uniformity of the wood.
- Reduced Absorption: It prevents the wood from absorbing excessive amounts of the final finish, saving on materials and achieving a consistent look.
- Ease of Sanding: Once dried, sanding sealers are easier to sand than bare wood, helping to achieve a smoother surface with less effort.
- Time-Saving: They dry quickly, allowing for faster progress on projects.
- Improved Durability: By sealing the wood, sanding sealers contribute to the longevity of the final finish, protecting the wood from moisture and wear.
Types of Sanding Sealers
- Shellac-Based Sealers: These are traditional and widely used sanding sealers known for their quick drying time and excellent adhesion. They are especially effective for sealing oily woods like rosewood and teak.
- Lacquer-Based Sealers: Preferred in commercial applications, lacquer-based sealers dry rapidly and are very durable. They are often used in conjunction with lacquer finishes.
- Water-Based Sealers: These are environmentally friendly options that are easy to clean up with water. They dry quickly and are compatible with most water-based and oil-based finishes.
- Oil-Based Sealers: These offer deeper penetration into the wood, enhancing the natural grain and providing a rich base for oil-based finishes.
How to Use Sanding Sealer
Using sanding sealer involves several key steps: preparation, application, sanding, and finishing. Below is a comprehensive guide on how to use sanding sealer effectively.
1. Preparation
Materials Needed:
- Sanding sealer
- Sandpaper(various grits)
- Tack cloth or vacuum
- Brush, spray gun, or cloth
- Protective gear (gloves, mask, eye protection)
Steps:
- Clean the Surface: Ensure the wood surface is clean and free of dust, dirt, and grease. Use a tack cloth or vacuum to remove any debris.
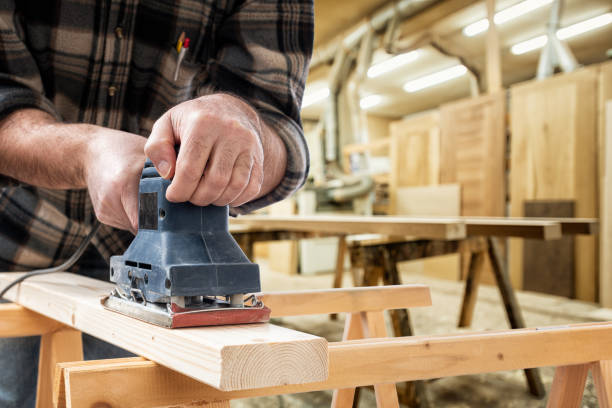
- Sand the Wood: Begin by sanding the wood with medium-grit sandpaper(such as 120 or 150 grit) to smooth out rough areas and open the wood grain for better sealer penetration. Finish with fine-grit sandpaper (220 grit) for a smooth surface.
- Remove Dust: After sanding, thoroughly remove all dust with a tack cloth or vacuum to ensure a clean surface for the sealer application.
2. Application
Steps:
- Stir the Sealer: Stir the sanding sealer thoroughly to ensure an even consistency. Avoid shaking, as this can introduce bubbles.
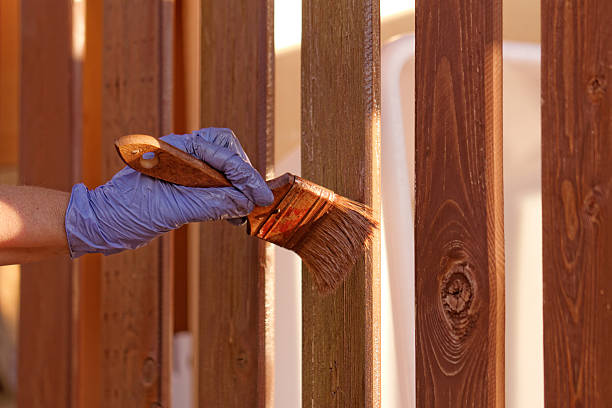
- Apply the Sealer: Use a brush, spray gun, or cloth to apply the sanding sealer evenly across the wood surface. Follow the manufacturer’s instructions regarding application thickness and techniques.
- Brushing: Use a high-quality brush and apply the sealer in long, even strokes following the wood grain. Avoid over-brushing, which can lead to uneven application and bubbles
- Spraying: If using a spray gun, apply a thin, even coat. Hold the gun at a consistent distance from the surface and move in steady, overlapping passes.
- Wiping: For wiping, use a lint-free cloth to apply a thin layer, working it into the wood grain and ensuring complete coverage.
3. Sanding
Steps:
- Dry the Sealer: Allow the sanding sealer to dry completely as per the manufacturer’s recommended drying time. This is typically around 1-2 hours but can vary based on the product and environmental conditions.
- Sand the Sealed Surface: Once dry, sand the surface lightly with fine-grit sandpaper (320-400 grit). This step smooths out any raised grain or imperfections and prepares the surface for the final finish.
- Remove Dust: Clean the surface again with a tack cloth or vacuum to remove any sanding dust.
4. Finishing
Steps:
- Inspect the Surface: Check for any imperfections or missed spots. Apply a second coat of sanding sealer if necessary, repeating the application and sanding steps.
- Apply the Final Finish: Once the surface is smooth and clean, proceed with your chosen final finish. Whether it’s lacquer, varnish, shellac, or polyurethane, follow the product’s instructions for best results.
- Layer and Sand: For the best finish, apply multiple coats of the final finish, sanding lightly between coats with fine-grit sandpaper (320-400 grit) to achieve a flawless, professional look.
Tips and Best Practices
- Test First: Always test the sanding sealer on a scrap piece of the same wood or an inconspicuous area to ensure compatibility and desired results.
- Ventilation: Ensure good ventilation when applying sanding sealer, especially for solvent-based products, to avoid inhaling fumes.
- Proper Tools: Use high-quality brushes and clean tools to prevent contamination and achieve a smooth application.
- Temperature and Humidity: Apply sanding sealer in a controlled environment with stable temperature and humidity levels to avoid issues like bubbles or extended drying times.
Common Mistakes to Avoid
- Skipping Preparation: Neglecting to properly sand and clean the wood surface before applying sanding sealer can lead to poor adhesion and an uneven finish.
- Over-Application: Applying too thick a coat of sanding sealer can cause it to dry improperly, leading to a rough surface and potential adhesion problems with the final finish.
- Insufficient Drying Time: Rushing the drying process can compromise the effectiveness of the sealer and the final finish. Always adhere to recommended drying times.
- Improper Sanding: Failing to sand the sealed surface adequately can result in a rough texture and uneven final finish. Sand lightly and thoroughly for best results.
- Incompatible Products: Using a sanding sealer that is not compatible with your final finish can lead to peeling, cracking, or other finish failures. Always check compatibility before application.
Choosing the Right Sandpaper
The type and grit of sandpaper you use at different stages of the sanding sealer process are crucial for achieving the best results. Here’s a guide on selecting the appropriate sandpaper:
- Initial Sanding: Use medium-grit sandpaper (120-150 grit) to smooth out rough areas and open the wood grain. This allows the sanding sealer to penetrate evenly.
- After First Sealer Coat: Use fine-grit sandpaper (220-320 grit) to sand the first coat of sanding sealer. This smooths the raised grain and any minor imperfections.
- Between Finish Coats: Use very fine-grit sandpaper (320-400 grit) for sanding between coats of the final finish. This ensures a smooth and even surface without removing too much of the finish.
Sandpaper Techniques
- Block Sanding: For flat surfaces, use a sanding block to ensure even pressure and avoid creating uneven spots or grooves.
- Hand Sanding: For curved or intricate areas, sand by hand using flexible sanding pads or sandpaper wrapped around a shaped object to match the contour.
- Orbital Sanders: For larger surfaces, an orbital sander can save time and effort. Ensure you use the appropriate grit sandpaper and apply light, even pressure to avoid swirl marks.
Conclusion
Sanding sealer is an essential tool in the woodworker’s arsenal, providing a foundation for beautiful, durable finishes. By understanding its purpose, benefits, and proper application techniques, you can enhance the quality of your woodworking projects significantly. Whether you are working on furniture, cabinetry, or intricate woodcrafts, using sanding sealer correctly ensures a professional and lasting finish that showcases the natural beauty of the wood. Proper preparation, including the right choice and use of sandpaper, is key to achieving the best results with sanding sealer.