
Are you looking to spruce up your home’s interior with new trim or give your existing trim a fresh new look? Sanding is an essential step in the process, but it can be a daunting task for many DIYers. In this article, we’ll provide you with a step-by-step guide on how to properly sand trim, including several questions that you may have along the way.
Why Do You Need to Sand Trim?
Sanding is an important step when working with wood trim because it helps to create a smooth, even surface that’s ready for painting or staining. It also helps to remove any imperfections, such as nicks or scratches, that may have occurred during the installation process. Sanding is particularly important if you’re planning to paint your trim, as it helps to ensure that the paint adheres properly and looks even.
What Tools Do You Need to Sand Trim?
Before you start sanding, you’ll need to gather some basic tools. These include:
- Sandpaper:You’ll need several different grits of sandpaper, ranging from coarse to fine. For most trim sanding jobs, 120-grit, 180-grit, and 220-grit sandpaper will suffice. You can also use a sanding sponge or sanding block to make the process easier.
- Sanding Block or Sponge:A sanding block or sponge can be used to hold the sandpaper securely and provide a flat surface for sanding.
- Dust Mask and Eye Protection: Sanding creates a lot of dust, so it’s important to wear a dust mask and eye protection to avoid inhaling or getting dust in your eyes.
- Vacuum or Shop Vac:You’ll need to clean up the dust created by sanding, so having a vacuum or shop vac handy is important.
Step-by-Step Guide to Sanding Trim
Now that you have your tools, it’s time to get started on the sanding process. Follow these steps for a smooth and even finish.
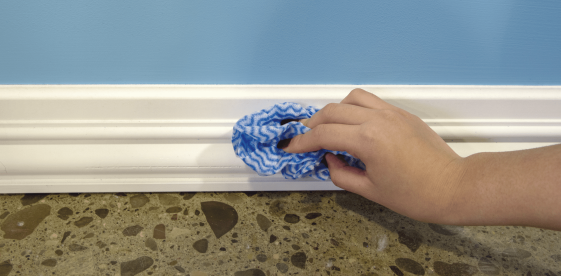
Step 1: Clean the Trim
Before you start sanding, it’s important to clean the trim thoroughly. Use a damp cloth to wipe down the surface of the trim, removing any dust, dirt, or debris. This will help to ensure that the sandpaper doesn’t get clogged up with particles, which can make the sanding process more difficult.
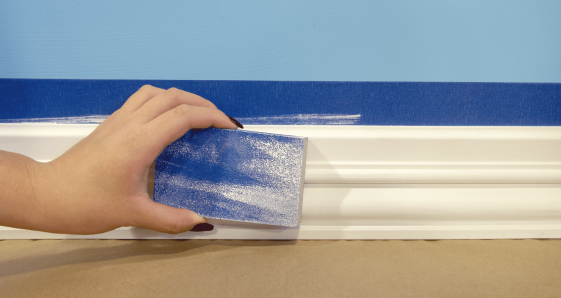
Step 2: Start with Coarse Grit Sandpaper
Begin by sanding the trim with the coarsest grit sandpaper, such as 120-grit. Hold the sandpaper securely with a sanding block or sponge and sand in the direction of the grain. Be careful not to sand too aggressively or you may damage the trim. Sand the entire surface of the trim until it’s smooth and even.
Step 3: Move on to Medium Grit Sandpaper
Once you’ve sanded the trim with the coarse grit sandpaper, it’s time to move on to the medium grit sandpaper, such as 180-grit. Again, sand in the direction of the grain, using a sanding block or sponge to hold the sandpaper securely. Sand the entire surface of the trim until it’s smooth and even.
Step 4: Finish with Fine Grit Sandpaper
Finally, sand the trim with the finest grit sandpaper, such as 220-grit. This will help to create a smooth, even surface that’s ready for painting or staining. Sand in the direction of the grain, using a sanding block or sanding sponge to hold the sandpaper securely. Be sure to sand the entire surface of the trim until it’s completely smooth and even.
Step 5: Clean up the Dust
After you’ve finished sanding, it’s important to clean up the dust that was created during the sanding process. Use a vacuum or shop vac to remove any dust from the surface of the trim, as well as from the surrounding area. Be sure to wear your dust mask and eye protection to avoid inhaling or getting dust in your eyes.
Step 6: Inspect the Trim
Once you’ve cleaned up the dust, take a close look at the trim to make sure that it’s completely smooth and even. If you notice any rough spots or areas that need more attention, go back and sand those areas again with the appropriate grit sandpaper.
Step 7: Apply Paint or Stain
After you’ve sanded the trim and cleaned up the dust, you’re ready to apply your paint or stain. Follow the manufacturer’s instructions for the paint or stain that you’re using, and be sure to use a high-quality brush or roller for a smooth and even finish.

Additional Tips for Sanding Trim
- Don’t rush the sanding process. Take your time to ensure that the trim is completely smooth and even before moving on to the next step.
- Be gentle with the sandpaper. You don’t want to damage the trim by sanding too aggressively.
- Always sand in the direction of the grain. Sanding against the grain can cause scratches and other imperfections.
- Use a sanding block or sponge to hold the sandpaper securely and provide a flat surface for sanding.
- Use a dust mask and eye protection to avoid inhaling or getting dust in your eyes.
- Clean up the dust as you go. This will make the sanding process easier and help to ensure that the trim is completely smooth and even.
Conclusion
In conclusion, sanding trim is an important step in creating a smooth and even surface that’s ready for painting or staining. By following the steps outlined in this guide and taking your time to ensure that the trim is completely smooth and even, you can achieve professional-looking results that will enhance the beauty of your home’s interior.