
Wooden chairs, with their timeless appeal and sturdy craftsmanship, often become cherished pieces of furniture. However, over time, wear and tear can take a toll on their appearance and functionality. Rather than discarding an old wooden chair, consider refurbishing it to breathe new life into this classic piece. In this comprehensive guide, we’ll explore the step-by-step process of how to refurbish a wooden chair, allowing you to unleash your creativity and restore its former glory.

Materials and Tools:
Before diving into the intricate world of sanding, gather the necessary materials and tools to ensure a smooth and successful refurbishment process:
Materials:
- An assortment of sandpapers (coarse, medium, and fine grits)
- Wood filler
- Wood glue
- Stain or paint
- Varnish or sealant
- Upholstery fabric (if applicable)
- Foam padding (if applicable)
Tools:
- Screwdriver
- Hammer
- Paintbrushes
- Putty knife
- Wood chisels
- Clamps
- Upholstery stapler (if applicable)
- Safety gear (gloves, goggles, mask)
Steps to Refurbish a Wooden Chair:
Refurbishing a wooden chair requires a systematic approach to ensure a successful transformation. Begin the process with a thorough assessment and cleaning of the chair’s condition.
Step 1: Assessment and Cleaning
Begin the refurbishment journey by carefully assessing the chair’s condition. Identify loose joints, cracks, or damaged areas, paying attention to the chair’s design and style. This assessment will guide your restoration decisions.
Once assessed, grant your chair a thorough cleaning. Employ a soft brush or cloth to eliminate dust, dirt, and any remnants of old finishes. This initial cleaning creates a pristine canvas for the intricate process of sanding.
Step 2: Disassembly
If your wooden chair possesses removable parts, such as a seat or backrest, gently disassemble them. Utilize a screwdriver to remove screws or bolts, ensuring you document their placement for seamless reassembly later. Disassembly facilitates the sanding process, allowing for greater access to individual components.
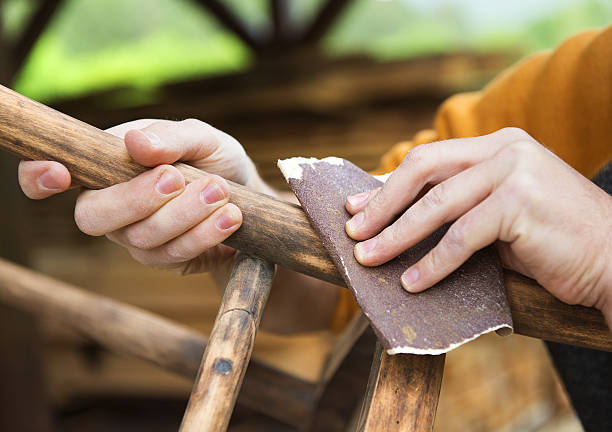
Step 3: Coarse Sanding
Enter the realm of sandpaper with the coarse grits (around 80-120) to remove existing paint or varnish. Embrace the raw power of coarse sandpaper to strip away layers of wear, revealing the natural beauty of the wood beneath. Focus on large surfaces and stubborn areas with this initial sanding.
Step 4: Wood Filler for Imperfections
As the chair’s surfaces become smoother, pay attention to imperfections such as scratches, dents, or cracks. Here’s where the wood filler comes into play. Apply it generously to these troubled spots, allowing it to dry thoroughly. Once dry, employ medium-grit sandpaper (around 150) to level the filled areas, creating a flawless surface.
Step 5: Medium Sanding
Transition to the medium-grit sandpaper (150-220) to refine the surfaces further. Smooth out the roughness left by the coarse sandpaper and focus on achieving an even texture across the entire chair. Keep the sandpaper in constant motion, following the grain of the wood for optimal results.
Step 6: Fine Sanding for a Silky Finish
 The final act of sanding involves the fine-grit sandpaper (220 and above). This stage polishes the wood to perfection, creating a silky-smooth finish. Engage in meticulous sanding, paying attention to detail and embracing the inherent beauty of the wood grain. By the end of this step, your wooden chair should exude a refined elegance, a testament to the transformative power of sandpaper.
Step 7: Repair and Wood Glue
Throughout the sanding process, be vigilant for any loose joints or areas requiring structural attention. Apply wood glue to these joints, securing them with clamps until the glue sets. Sand the repaired areas once more to seamlessly integrate them into the overall aesthetic.
Step 8: Staining or Painting
With the wood now prepped to perfection, it’s time to make a crucial decision – stain or paint? If you opt for staining, apply it evenly, reveling in the enhanced natural beauty of the wood. For a more dramatic change, embrace the world of paint, selecting high-quality options suitable for wooden furniture. Regardless of your choice, let each coat dry completely before applying the next, ensuring a flawless and enduring finish.
Step 9: Varnish for Protection
Preserve the fruits of your labor by applying a clear varnish or sealant. This protective layer shields the wood from the rigors of daily use while enhancing its durability. Choose a finish that complements your chair’s style and overall aesthetic, applying multiple thin coats for a lasting and exquisite result.
Step 10: Reassembly
If disassembled earlier, now is the time to carefully reassemble your wooden chair. Utilize the notes you took during disassembly to guide the reassembly process. Tighten screws or bolts securely, ensuring all parts fit snugly together. This step is pivotal for the chair’s stability and functionality.
Step 11: Upholstery (Optional)
For wooden chairs with an upholstered seat or backrest, the final touch involves a creative exploration of upholstery. Remove the existing fabric and padding, inspecting the frame for any additional repairs. Cut new foam padding to size, wrapping it in your chosen upholstery fabric. Secure the fabric to the chair frame with an upholstery stapler, pulling it taut for a professional and inviting finish.
Step 12: Final Inspection
Before declaring your refurbishment masterpiece complete, conduct a final inspection of the chair. Scrutinize for any overlooked imperfections, loose joints, or uneven finishes. Address any issues that arise, ensuring your chair not only boasts a rejuvenated appearance but also stands as a testament to your dedication to craftsmanship.
Conclusion:
Embarking on the journey of refurbishing a wooden chair is a rewarding endeavor that elevates a functional piece of furniture to a work of art. Sandpaper, often the unsung hero of the process, plays a pivotal role in revealing the inherent beauty of the wood and creating a flawless finish. By following this comprehensive guide, you not only breathe new life into your wooden chair but also gain a profound appreciation for the transformative power of sanding. So, with sandpaper in hand, embrace the art of refurbishment and witness the elegance that emerges from the careful restoration of a classic wooden chair.