
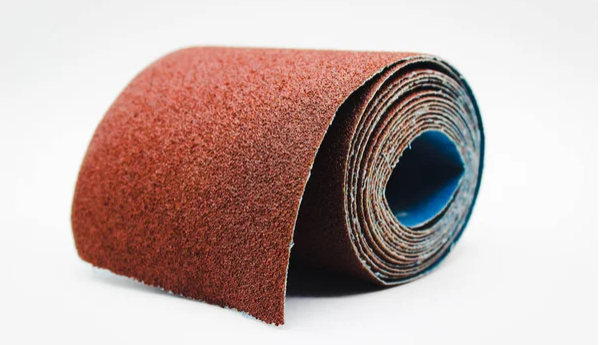
Sanding belts are essential tools for achieving smooth surfaces and precise finishes in various woodworking and metalworking projects. However, over time, these belts can become worn, torn, or damaged, reducing their effectiveness and requiring replacement. In this article, we will explore the reasons why sanding belts often require repairs and provide practical solutions to extend their lifespan.
Why Do Sanding Belts Need Repair?
- Frayed Edges:Constant friction and contact with rough surfaces can cause sanding belts to develop frayed edges. This makes them less effective in sanding and can also lead to tearing. Repairing frayed edges helps maintain the belt’s performance and prevent further damage.

- Joint Separation:Sanding belts consist of a joint that connects the two ends. With regular use, this joint can weaken and eventually separate, rendering the belt unusable. Repairing joint separation ensures the belt remains intact and functional.
- Glue Failure: Sanding beltsare often constructed by bonding abrasive material to a backing with adhesive. Over time, the glue can fail, causing the abrasive material to detach from the belt. Repairing glue failure helps restore the belt’s effectiveness and extends its lifespan.
- Loading or Clogging:Sanding belts can accumulate debris and dust, leading to reduced effectiveness and premature wear. Repairing loading or clogging issues involves cleaning and unclogging the belt, ensuring optimal performance.
How to Repair Sanding Belts?
Step 1: Assess the Damage
The first step in repairing a sanding belt is to assess the extent of the damage. Carefully examine the belt and look for signs of wear, tears, frayed edges, or adhesive failure. This assessment will help you determine the appropriate repair method.
Step 2: Prepare the necessary tools
Gather the required tools for the repair process, such as a utility knife, sandpaper, strong adhesive (like epoxy or contact cement), and clamps.
Step 3: Trim Frayed Edges
If the sanding belt has frayed edges, use scissors or a utility knife to trim them. Make sure to cut the frayed edges cleanly and evenly to prevent further damage to the belt. This step will improve the belt’s performance and prevent it from snagging or tearing during use.
Step 4: Repair Small Tears
For small tears in the sanding belt, you can use adhesive to repair them. Apply a small amount of adhesive along the edges of the tear and carefully align the torn edges. Press them together firmly to ensure a secure bond. Allow the adhesive to dry completely before using the belt again.
Step 5: Patch Larger Tears
If the sanding belt has a larger tear that cannot be repaired with adhesive alone, you can use a patch to reinforce the damaged area. Cut a piece of sandpaper or a specialized belt repair tape slightly larger than the tear. Apply adhesive to both the patch and the torn area of the belt. Place the patch over the tear and press it firmly, ensuring a strong bond between the patch and the belt. Allow the adhesive to dry completely before using the belt.
Step 6: Replace Failed Adhesive
If the adhesive bonding the abrasive material to the belt has failed, you will need to reattach it. Carefully remove the loose or detached section of the abrasive material from the belt. Apply adhesive to both the belt and the back of the abrasive material. Press the material firmly onto the belt, ensuring it is aligned correctly. Allow the adhesive to dry completely before using the belt.
Step 7: Sand Down Uneven Areas
If you notice uneven areas on the sanding belt’s abrasive surface, it’s essential to sand them down for optimal performance. Use a fine-grit sandpaper or a sanding block to gently sand the uneven spots until they are level with the surrounding area. This step will ensure consistent sanding and prevent the belt from leaving uneven marks on your workpiece.
Step 8: Replace Failed Adhesive
If the adhesive bonding the abrasive material to the belt has failed, you will need to reattach it. Carefully remove the loose or detached section of the abrasive material from the belt. Apply adhesive to both the belt and the back of the abrasive material. Press the material firmly onto the belt, ensuring it is aligned correctly. Allow the adhesive to dry completely before using the belt.
Additional Tips for Extending Sanding Belt Lifespan
To maximize the lifespan of your repaired and new sanding belts, consider the following tips:
- Proper storage:Store sanding belts in a dry, clean area away from direct sunlight to prevent moisture damage or warping.
- Tension adjustment:Adjust the tension of your belt sander appropriately to minimize excessive strain on the belt, reducing the risk of damage.
- Regular cleaning:Clean sanding belts after use to remove accumulated dust and debris. This helps prevent clogging and improves their efficiency.
- Avoid overheating: Use moderate pressure and avoid excessive friction, which can cause the belt to overheat and deteriorate faster.
- Multiple grits: Utilize multiple grit sanding belts for different stages of your project to prevent excessive wear on a single belt.
Conclusion
Repairing sanding belts is a cost-effective and environmentally friendly way to extend their lifespan and reduce waste. By following the step-by-step guide provided in this article, you can easily fix minor damages and keep your sanding belts in optimal condition. Remember to assess the damage, gather the necessary tools, and use appropriate adhesives and clamps during the repair process. Additionally, implementing good maintenance practices, such as proper storage, tension adjustment, regular cleaning, and using multiple grit belts, will further extend the lifespan of your sanding belts. With these tips in mind, you can save money, reduce waste, and ensure your sanding belts remain reliable tools for your future projects.