
Embarking on do-it-yourself (DIY) projects can be both satisfying and cost-effective, allowing you to transform your living space with a personal touch. One indispensable tool that often goes unnoticed is the sanding sponge. Whether you’re refinishing furniture, restoring wooden floors, or smoothing out surfaces, the sanding sponge is a versatile and handy accessory for achieving professional-looking results. In this guide, we’ll delve into the world of sanding sponges, exploring their types, uses, and essential tips for incorporating them into your DIY toolkit.

What are Sanding Sponges?
Sanding sponges are an essential part of any DIY enthusiast’s toolkit, offering a flexible and efficient solution for various sanding applications. These sponges are constructed with an abrasive surface, usually coated with sandpaper-like materials, attached to a sponge backing. The sponge provides flexibility, allowing the tool to conform to different shapes and contours, making it ideal for intricate projects.
Types of Sanding Sponges
Coarse grit sanding sponges are designed for heavy-duty sanding tasks. They are effective for removing old paint, rust, or other stubborn materials from surfaces. These sponges typically have grits ranging from 40 to 80, providing aggressive abrasion to quickly smooth rough areas.
- Medium Grit Sanding Sponges:
Medium grit sanding sponges, with grits ranging from 100 to 180, are versatile and suitable for various projects. They can be used for smoothing surfaces, preparing them for paint or stain, and refining the results of coarse grit sanding.
- Fine Grit Sanding Sponges:
Fine grit sanding sponges, with grits above 180, are perfect for finishing touches. They are designed to remove fine imperfections, creating a smooth and polished surface. These sponges are commonly used for final sanding before applying finishes like varnish or paint.
- Micro Grit Sanding Sponges:
Micro grit sanding sponges are the finest type, featuring grits beyond 600. These sponges are excellent for delicate projects, providing a mirror-like finish. They are often used in woodworking and fine detailing work.
Using Sanding Sponges: Step-by-Step Guide
- Surface Preparation:
Before using a sanding sponge, ensure that the surface is clean and free from dust, debris, or any loose particles. If needed, use a tack cloth to wipe away any remaining residue.
- Selecting the Right Grit:
Choose the appropriate grit based on your project requirements. Coarse grits are suitable for initial material removal, while finer grits are used for smoothing and finishing. If uncertain, start with a medium grit and adjust as needed.
- Wet or Dry Sanding:
Sanding sponges can be used for both wet and dry sanding. Wet sanding helps control dust and provides a smoother finish. Ensure that the sponge you choose is compatible with the method you prefer.
- Gentle Pressure and Even Strokes:
Apply gentle and even pressure on the sanding sponge to avoid over-sanding or causing uneven surfaces. Use long, straight strokes for flat surfaces and circular motions for curved or contoured areas.
- Frequent Inspection:
Regularly inspect the sanding sponge during use. If the abrasive surface becomes clogged with material, clean it by tapping or brushing the sponge. This ensures consistent performance and prolongs the life of the sponge.
- Changing Grits:
As you progress through your project, you may need to switch to finer grits for a smoother finish. Gradually transition from coarse to medium to fine grits, ensuring each step removes the marks left by the previous grit.
- Safety Measures:
Wear appropriate safety gear, including safety glasses and a dust mask, especially when sanding materials that generate fine dust particles. Adequate ventilation is essential, particularly in confined spaces.
Tips and Tricks for Optimal Results
- Use a Sanding Block for Flat Surfaces:
When working on flat surfaces, attach the sanding sponge to a sanding block. This provides stability and ensures an even distribution of pressure, resulting in a smoother finish.
- Customize Shapes with Scissors:
Sanding sponges can be easily cut into smaller pieces or custom shapes to suit the contours of your project. This allows for more precise sanding in tight or hard-to-reach areas.
- Combine Sanding Sponges with Other Tools:
For comprehensive results, combine the use of sanding sponges with other tools like power sanders, hand sanders, or paint strippers. This combination enhances efficiency and saves time on larger projects.
- Experiment on Scrap Material:
Before starting your main project, practice on a scrap piece of material to familiarize yourself with the sanding sponge and determine the optimal technique for your specific application.
- Regular Cleaning and Maintenance:
Clean the sanding sponge regularly during use to prevent clogging. If the sponge becomes excessively worn or the abrasive surface wears out, replace it with a new one for consistent results.
Common Mistakes to Avoid
Embarking on DIY projects can be a rewarding experience, but it’s essential to be aware of common mistakes that can hinder your progress and compromise the quality of your work. In the context of using sanding sponges, avoiding these pitfalls is crucial for achieving optimal results. Let’s delve into some common mistakes and how to steer clear of them.
- Neglecting Surface Preparation:
One of the fundamental mistakes is neglecting proper surface preparation. Skipping this step can lead to uneven results and premature wear on your sanding sponge. Ensure surfaces are clean, free from debris, and well-prepared before you start sanding.
- Choosing the Wrong Grit:
Selecting the wrong grit for your sanding sponge can significantly impact the outcome. Using a coarse grit on a delicate surface may result in excessive material removal, while a fine grit on a rough surface might be ineffective. Take the time to understand your project’s requirements and choose the appropriate grit accordingly.
- Inconsistent Pressure:
Applying inconsistent pressure while sanding is a common mistake that can lead to uneven surfaces. Whether you’re using a coarse or fine grit, maintain a steady and even pressure on the sanding sponge to achieve uniform results.
- Ignoring Safety Measures:
Safety should be a top priority in any DIY project. Neglecting to wear safety gear, such as safety glasses and a dust mask, can expose you to potential hazards. Always protect yourself, especially when working with materials that generate fine dust particles.
- Overlooking Sponge Cleaning:
Failing to clean the sanding sponge regularly can result in reduced efficiency and compromised performance. The abrasive surface can become clogged with material, affecting its ability to sand effectively. Tap or brush the sponge frequently to prevent clogging and ensure a smooth sanding process.
- Skipping Gradual Grit Transitions:
Transitioning too quickly between grits is a common oversight. Each grit level serves a specific purpose, from material removal to finishing touches. Skipping intermediate grits can leave visible marks on your project, affecting its overall appearance. Gradually progress from coarse to medium to fine grits for the best results.
- Not Experimenting on Scrap Material:
Failing to practice on scrap material before tackling your main project is a common error. Different materials and surfaces may react differently to sanding. Take the time to experiment on a small, inconspicuous area to understand how your chosen sanding sponge performs on the specific material.
Applications of Sanding Sponges in DIY Projects
Now that we’ve explored common mistakes to avoid, let’s delve into the diverse applications of sanding sponges across various DIY projects.
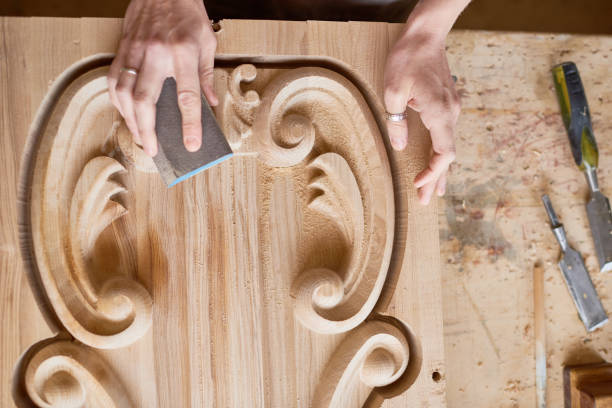
- Woodworking Projects:
Sanding sponges are indispensable for woodworking enthusiasts. They can be used to smooth rough edges, refine intricate details, and prepare surfaces for staining or painting. The flexibility of sanding sponges makes them ideal for contouring and shaping wood.
- Furniture Restoration:
Restoring old furniture often involves removing layers of paint, varnish, or other finishes. Coarse grit sanding sponges are excellent for stripping away old coatings, while finer grits help achieve a smooth surface before applying a new finish.
- Home Renovations:
Whether you’re refinishing cabinets, doors, or molding, sanding sponges are versatile tools for home renovations. They can tackle various surfaces, including flat and contoured areas, ensuring a consistent finish throughout your project.
- Drywall Sanding:
Sanding sponges with medium to fine grits are effective for drywall sanding. They can smooth seams, joints, and imperfections, providing a flawless surface for painting. The sponge’s flexibility allows it to conform to the curves and corners of the drywall.
- Metal Surface Preparation:
Coarse grit sanding sponges are valuable for preparing metal surfaces by removing rust, paint, or corrosion. They offer a quick and efficient way to ready metal for priming and painting, contributing to the longevity of metal objects.
- DIY Craft Projects:
Sanding sponges find their place in various craft projects, such as sanding wooden components for handmade furniture, smoothing surfaces for painting in art projects, or preparing materials for intricate designs. Their flexibility allows for precision in detailed work.
- Automotive Restoration:
DIY enthusiasts working on automotive projects can benefit from sanding sponges when restoring the exterior or interior surfaces of vehicles. From smoothing body filler to preparing surfaces for painting, sanding sponges are valuable tools in the automotive DIY toolkit.
Conclusion
Sanding sponges are invaluable tools for DIY enthusiasts, providing versatility, flexibility, and efficiency in various sanding applications. Whether you’re refinishing furniture, restoring wooden floors, or smoothing out surfaces, understanding the different types of sanding sponges and their proper usage is crucial for achieving professional-looking results. By following the step-by-step guide and incorporating tips and tricks into your DIY projects, you’ll master the art of using sanding sponges, elevating the quality of your creations and renovations.