
Polishing pads are indispensable tools in the arsenal of any detailing enthusiast or professional. They play a crucial role in achieving that coveted glossy finish on automotive surfaces, countertops, floors, and various other materials. However, to harness their full potential and ensure optimal performance, proper priming is essential. In this comprehensive guide, we’ll delve into the intricacies of priming polishing pads, offering step-by-step instructions, expert tips, and insights to help you master this fundamental aspect of the detailing process.
What You Need to Know about Polishing Pads?
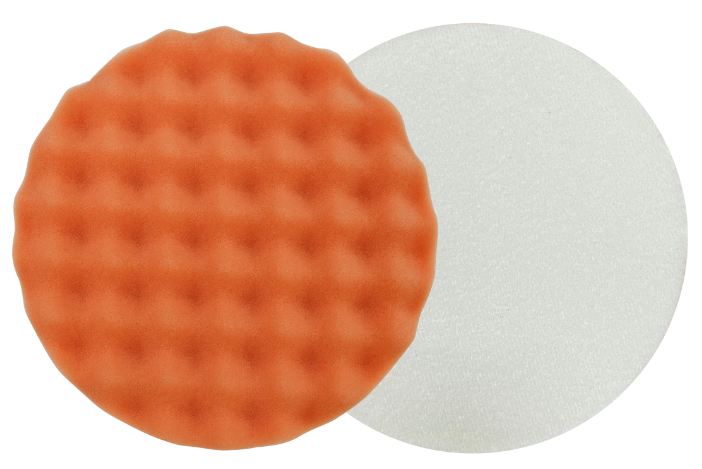
Before delving into the priming process, it’s crucial to understand the anatomy of polishing pads. These pads come in various types, each designed for specific purposes and materials. Common types include foam, microfiber, wool, and hybrid pads, each offering unique characteristics in terms of cutting ability, finishing, and heat dispersion.
Foam pads, for instance, are renowned for their versatility, ranging from aggressive cutting pads to ultra-soft finishing pads. Microfiber pads excel in cutting through heavy defects, while wool pads are preferred for their cutting power and heat resistance. Hybrid pads combine different materials to offer a balance between cutting and finishing.
Priming: Why It Matters?
Priming a polishing pad involves prepping it before use to optimize its performance and longevity. Proper priming serves several crucial purposes:
- Enhances Pad Performance:Priming ensures that the pad is properly conditioned, allowing it to deliver consistent results throughout the polishing process.
- Improves Product Distribution: A primed pad absorbs and distributes polishing compounds or liquids evenly, preventing uneven application and minimizing product wastage.
- Extends Pad Lifespan: By priming the pad correctly, you reduce the risk of premature wear and tear, thereby prolonging its lifespan and saving costs in the long run.
Step-by-Step Guide to Priming a Polishing Pad:
Now, let’s explore the step-by-step process of priming a polishing pad:
Step 1: Selection of Pad and Polishing Product
Begin by selecting the appropriate polishing pad based on the desired level of correction and finish. Likewise, choose a compatible polishing product suitable for the task at hand, considering factors such as abrasiveness, lubrication, and compatibility with pad materials.
Step 2: Inspection and Cleaning
Inspect the polishing pad for any signs of damage, contamination, or residue from previous use. Clean the pad thoroughly using a pad cleaning solution or mild detergent to remove dirt, oils, and residues. Rinse the pad thoroughly and allow it to dry completely before proceeding.
Step 3: Apply Polishing Product
Apply a small amount of the chosen polishing product onto the surface of the polishing pad. The amount may vary depending on the pad size and the extent of the polishing job. Start with a conservative amount, as you can always add more if needed.
Step 4: Spread the Product
Using your fingers or a pad conditioning brush, spread the polishing product evenly across the surface of the pad. Ensure uniform coverage to facilitate consistent polishing results and prevent dry spots that may cause marring or uneven correction.
Step 5: Work the Product Into the Pad
Massage the polishing product into the pad fibers or pores, allowing it to penetrate and saturate the material effectively. This step helps condition the pad, ensuring optimal performance and product distribution during the polishing process.
Step 6: Allow for Dwell Time
Allow the primed pad to sit for a few minutes, allowing the polishing product to fully absorb into the pad and activate its cutting or finishing properties. This dwell time enhances the pad’s effectiveness and ensures seamless integration between the pad and the polishing compound.
Step 7: Test for Proper Priming
Before proceeding with the actual polishing task, perform a test spot on a small inconspicuous area to ensure that the pad is adequately primed and ready for use. Evaluate the results to confirm proper product distribution, pad saturation, and performance.
Step 8: Adjust as Needed
Based on the test spot results, adjust the amount of polishing product applied or the priming technique if necessary. Fine-tune your approach to achieve the desired level of correction, finish, and overall polishing performance.
Expert Tips for Optimal Priming:
In addition to the basic steps outlined above, here are some expert tips to help you master the art of priming polishing pads:
- Use the Right Amount of Product: Avoid overloading the pad with polishing product, as excess product can lead to messy application, product sling, and inefficient polishing.
- Rotate Pads for Even Wear: To maximize the lifespan of your polishing pads, rotate them regularly during use to distribute wear evenly across the surface. This practice helps maintain consistent performance and prolongs pad longevity.
- Clean Pads After Use: After completing the polishing task, clean the pads promptly to remove any residues or contaminants that may compromise their performance. Proper maintenance helps preserve pad integrity and ensures optimal results over time.
- Store Pads Properly:Store your polishing pads in a clean, dry environment away from direct sunlight and extreme temperatures. Avoid stacking or compressing pads, as this can deform their shape and affect their performance.
Common Mistakes to Avoid:
While priming a polishing pad may seem straightforward, certain common mistakes can compromise the effectiveness of the process. Here are some pitfalls to avoid:
- Skipping the Inspection and Cleaning Step: Neglecting to inspect and clean the polishing pad thoroughly before priming can result in poor performance and potential damage to the surface being polished. Always take the time to inspect and clean the pad to ensure optimal results.
- Using Excessive Pressure: Applying excessive pressure when priming the pad can lead to overloading and uneven distribution of the polishing product. Instead, use gentle pressure and let the product absorb into the pad naturally for optimal saturation and performance.
- Neglecting Dwell Time: Rushing through the priming process without allowing sufficient dwell time can compromise the effectiveness of the pad. Be patient and allow the polishing product to penetrate the pad fibers or pores fully for best results.
- Using the Wrong Pad/Product Combination: Not all polishing pads are compatible with every polishing product. Using the wrong combination can result in poor performance, marring, or even damage to the surface being polished. Always ensure compatibility between the pad and the product for optimal results.
Conclusion:
Priming a polishing pad is a fundamental yet often overlooked aspect of the detailing process. By following the step-by-step guide and expert tips outlined in this article, you can ensure that your pads are properly conditioned for optimal performance and longevity. Whether you’re a detailing enthusiast or a seasoned professional, mastering the art of pad priming will elevate your polishing game and help you achieve flawless results with every project.