
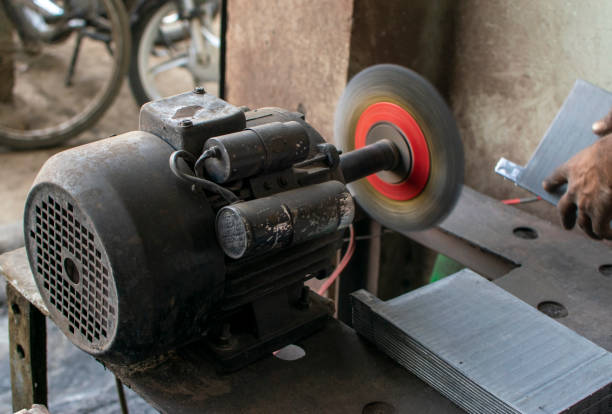
Bench grinders are stalwart fixtures in workshops, garages, and industrial settings, serving as versatile tools for tasks ranging from sharpening blades to polishing metal surfaces. Among the plethora of accessories available for bench grinders, wire wheels stand out for their effectiveness in tasks such as rust removal, surface preparation, and deburring. However, the process of installing wire wheels correctly is paramount for safety and optimal performance. In this exhaustive guide, we will delve into the intricate process of installing wire wheels on bench grinders, covering two prevalent types: crimped wire wheels and knotted wire wheels.

What to Know about Wire Wheels?
Before embarking on the installation journey, it’s essential to grasp the fundamental characteristics of the two primary types of wire wheels commonly employed with bench grinders:
- Crimped Wire Wheels: These wheels are crafted from multiple steel wires crimped together, offering flexibility and resilience. They excel in lighter applications such as light rust removal, polishing, and surface conditioning.
- Knotted Wire Wheels: Unlike their crimped counterparts, knotted wire wheels feature wires that are twisted and knotted together, resulting in a more aggressive cutting action. They are well-suited for heavy-duty tasks like weld cleaning, scale removal, and surface blending.
Tools and Materials Required
Before commencing the installation process, gather the following tools and materials:
- Bench grinder
- Crimped wire wheel(s)
- Knotted wire wheel(s)
- Safety gloves and goggles
- Adjustable wrench
- Arbor adapters (if required)
- Locking pliers (optional)
- Wire brush (for arbor cleaning)
- Safety Precautions
Prioritize safety throughout the installation process:
- Wear Protective Gear:Don safety gloves and goggles to shield your hands and eyes from wire wheel fragments and debris.
- Power Off: Disconnect the bench grinder from the power source before initiating any installation procedures to prevent accidental activation.
- Stable Work Surface: Ensure the bench grinder is placed on a stable work surface, free from obstructions, to minimize the risk of tipping or instability during installation.
- Secure Components: Use locking pliers, if necessary, to immobilize the wire wheel during tightening to prevent slippage or movement.
- Inspect Equipment: Thoroughly examine the bench grinder, wire wheels, and associated components for any signs of damage or wear before installation. Replace any worn or damaged parts to maintain safety and functionality.
- Follow Manufacturer Instructions: Adhere to the manufacturer’s guidelines and recommendations for the specific bench grinder and wire wheel models being used.
Installation Process
Follow these meticulously outlined steps to ensure the seamless installation of wire wheels on your bench grinder:
Step 1: Prioritize Safety
Before embarking on any installation procedure, ensure that the bench grinder is disconnected from the power source to prevent inadvertent activation. Equally crucial is the donning of safety gloves and goggles to shield your hands and eyes from wire wheel fragments and debris.
Step 2: Select the Appropriate Wheel
Carefully assess the intended application to determine whether a crimped or knotted wire wheel is most suitable. Crimped wire wheels are ideal for lighter tasks, whereas knotted wire wheels are better equipped to handle heavy-duty applications.
Step 3: Inspect the Bench Grinder
Thoroughly examine the bench grinder’s arbor to ascertain its cleanliness and freedom from debris. Utilize a wire brush to meticulously cleanse the arbor threads if necessitated. Additionally, scrutinize the arbor nut to ensure its integrity and capability to securely fasten the wire wheel in place.
Step 4: Mount the Wire Wheel
With meticulous precision, position the selected wire wheel onto the bench grinder’s arbor, ensuring a snug fit against the arbor flange. In instances where the arbor diameter and wheel center hole size do not align, deploy arbor adapters to achieve the desired compatibility.
Step 5: Secure the Wire Wheel
Proceed to thread the arbor nut onto the arbor shaft by hand, exerting sufficient force to secure the wire wheel in position. Employ an adjustable wrench to meticulously tighten the nut, ensuring that the wire wheel is firmly affixed. For an added layer of security, consider utilizing locking pliers to immobilize the wheel during the tightening process.
Step 6: Verify Alignment
Following the secure fastening of the wire wheel, conduct a meticulous visual assessment to confirm its alignment with the bench grinder’s guard. Any deviations from the optimal alignment could precipitate vibration or uneven wear of the wire wheel. Rectify any misalignments by loosening the arbor nut, repositioning the wheel, and subsequently retightening the nut.
Step 7: Final Inspection
With the wire wheel securely installed and aligned, conduct a comprehensive final inspection to scrutinize for any loose components or irregularities. Address any anomalies promptly to ensure the integrity and efficacy of the installation.
Step 8: Power On and Test
With the wire wheel firmly in place, proceed to reconnect the bench grinder to the power source and power it on. Allow the grinder to attain full operational speed before initiating contact between the workpiece and the wire wheel. Conduct a series of test runs on a scrap material to evaluate the wire wheel’s performance, ensuring smooth operation and optimal efficacy.
Conclusion
The installation of wire wheels on bench grinders represents a nuanced process that demands meticulous attention to detail and adherence to safety protocols. By meticulously following the outlined steps and prioritizing safety precautions, you can confidently install wire wheels to augment the functionality and versatility of your bench grinder. Whether you’re embarking on light surface conditioning tasks or tackling heavy-duty metalworking endeavors, the proper installation of wire wheels is indispensable for achieving optimal results. Remember to prioritize safety at all times and adhere to best practices to ensure the longevity and efficacy of your bench grinder and wire wheels.