
Deep scratches on car paint can be an unsightly and frustrating problem for car owners. These scratches, which penetrate the clear coat and sometimes even the base layer of paint, can be caused by a variety of factors such as accidental scrapes, keying, and debris on the road. Not only do they detract from the overall appearance of the vehicle, but they can also lead to further damage if left untreated.
Repairing a deep scratch in a car’s paint can be a daunting task, fortunately, there are ways to repair deep scratches in car paint, and with a little know-how and some elbow grease, car owners can tackle this job on their own. In this essay, we will discuss step-by-step how to repair a deep scratch in car paint in a DIY approach.
What material to use to repair a deep scratch in car paint
Before beginning the process of repairing a deep scratch in car paint, it’s essential to gather the necessary materials. The following items will be required:
- Touch-Up Paint: The touch-up paint should match the color of the car’s paint.
- Sandpaper:600-grit sandpaper 1500-grit sandpaper, and 2000-grit sandpaper will be required.
- Microfiber Towels: These towels are necessary for cleaning the surface and drying the paint after the repair.
- Rubbing Compound: A rubbing compound is used to remove scratches and imperfections on the paint’s surface.
- Wax: Wax is applied to the repaired area to protect it from environmental factors and help it blend in with the surrounding paint.
How to repair a Deep Scratch in Car Paint
Now that we have all the materials required let us discuss the step-by-step guide to repairing a deep scratch in car paint.
Step 1: Clean the Damaged Area
Before starting the repair process, the area around the scratch should be thoroughly cleaned. This will remove any dirt, debris, or wax that may be covering the scratch and provide a clear view of the damage. A mild car soap and water solution can be used for cleaning, followed by a wipe-down with a microfiber towel to ensure the surface is dry.
Step 2: Sand with Finer Grit Sandpapers
Once the area is clean and dry, the next step is to sand the scratch. This will remove any loose paint and smooth out the edges of the scratch.
- Use 600 grit sandpaperto sand the touch-up paint down to the level of the surrounding paint, being careful not to sand through the touch-up paint.
- Switch to 1500 grit sandpaperand sand the area again, blending the touch-up paint into the surrounding paint. Rinse with water and dry with a microfiber cloth.
- Use 2000 grit sandpaperto further smooth the surface of the paint. Rinse with water and dry with a microfiber cloth.
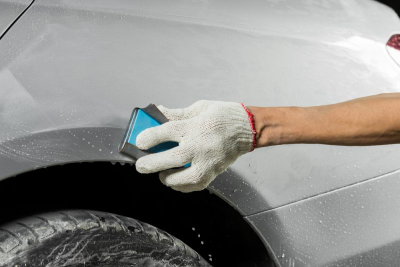
Step 3: Clean and Dry the Surface
Once you’ve finished sanding, clean the area again with a mild soap and water solution and dry it thoroughly with a microfiber towel. This will ensure that no dust or debris remains on the surface.
Step 4: Apply Touch-Up Paint
Now it’s time to apply the touch-up paint. Begin by shaking the touch-up paint bottle well and opening it. Using the applicator brush provided, carefully apply the paint to the damaged area, taking care not to apply too much. It’s better to apply several thin coats than one thick coat, as this will help the paint to blend in with the surrounding area more effectively.
Step 5: Allow the Paint to Dry
After applying the touch-up paint, allow it to dry completely. This can take up to 24 hours, so it’s important to be patient and avoid touching the area until the paint is fully dry.
Step 6: Buff the Area with Rubbing Compound
Once the paint is dry , it’s time to buff the area with rubbing compound. Apply a small amount of rubbing compound to a microfiber towel and gently rub the repaired area in a circular motion. This will remove any imperfections and smooth out the surface of the paint. Be careful not to rub too hard or too long, as this can damage the touch-up paint.
Step 7: Apply Wax
Finally, apply a small amount of wax to the repaired area to protect it from environmental factors and help it blend in with the surrounding paint. Use a microfiber towel to apply the wax in a circular motion and remove any excess. This will provide a protective layer that will help the repair to last longer and maintain its appearance.
Q & A
Q: How do I know if a scratch is deep enough to require touch-up paint? A: A scratch is considered deep enough for touch-up paint if it has penetrated through the clear coat and into the base coat. You can check this by running your fingernail across the scratch. If your fingernail catches in the scratch, it’s deep enough for touch-up paint.
Q: Can I use a spray can of touch-up paint instead of a bottle with an applicator brush?
A: Yes, you can use a spray can of touch-up paint if it’s available in the color of your car. Just be sure to follow the instructions on the can carefully and apply the paint in light, even coats to avoid overspray.
Q: Can I repair multiple deep scratches on my car at once?
A: Yes, you can repair multiple deep scratches on your car at once. Just be sure to take your time and follow the same steps outlined above for each scratch. It may be helpful to tackle one scratch at a time to avoid becoming overwhelmed.
Q: Can I use a power buffer to apply the rubbing compound?
A: It’s possible to use a power buffer to apply the rubbing compound, but it’s not recommended for beginners. Power buffers can be powerful and if not used properly, can cause further damage to the paint. It’s best to stick with a microfiber towel and apply the rubbing compound in a circular motion by hand.
Q: Can I wash my car after I’ve repaired a deep scratch?
A: It’s best to wait at least a week after repairing a deep scratch before washing your car. This will give the touch-up paint and clear coat time to fully cure. When you do wash your car, use a mild soap and a soft cloth to avoid scratching the repaired area.
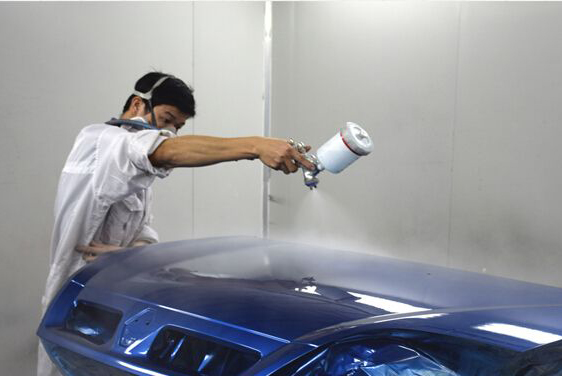
Q: Is it possible to repair a scratch in a metallic paint finish?
A: Yes, it’s possible to repair a scratch in a metallic paint finish, but it can be more challenging than repairing a scratch in a non-metallic finish. Metallic paints have small metallic flakes that reflect light, and it can be difficult to match the color and texture of the surrounding paint. It’s best to consult a professional auto body shop for metallic paint repairs.
Conclusion
Repairing a deep scratch in car paint can be a daunting task, but with the right materials and a little bit of know-how, it’s possible to tackle this job on your own. By following the step-by-step guide outlined above, car owners can save money and maintain the appearance and value of their vehicle. Remember, patience and attention to detail are key to achieving a successful repair, but please notice that if the scratch is very deep and extends to the metal, it may require more extensive repair than what can be done at home. In this case, it may be best to take the car to a professional.