
In the realm of woodworking and DIY projects, achieving the perfect finish is often the hallmark of a skilled craftsman. While there are numerous techniques available, one that stands out for its versatility and simplicity is the use of a wire brush. With a wire brush, you can add texture and character to wood surfaces, elevating your projects to new heights. In this guide, we’ll delve into the art of creating textured finishes with a wire brush.
Understanding the Wire Brush:
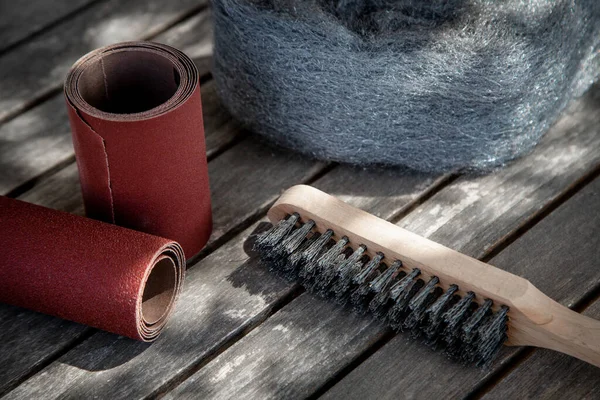
Before we dive into the process, it’s essential to understand the tool we’ll be working with – the wire brush. Typically consisting of a handle and a head with bristles made of metal wires, wire brushes come in various shapes and sizes. These brushes are designed to remove rust, paint, and other surface coatings, but they also excel at creating unique textures on wood.
Choosing the Right Wood:
The type of wood you use will greatly influence the outcome of your textured finish. Softwoods like pine and cedar tend to respond well to wire brushing, as their softer nature allows the bristles to create deeper grooves and patterns. Hardwoods such as oak and maple can also be textured with a wire brush, though the results may be more subtle.
Preparing the Surface:
Before you begin wire brushing, it’s crucial to prepare the wood surface properly. Start by sanding the wood to remove any rough spots or imperfections. This will ensure that the wire brush glides smoothly across the surface, creating an even texture. Additionally, consider applying a coat of wood conditioner to the surface to help prevent the wood from splintering or tearing during the brushing process.
Choosing the Right Brush:
When it comes to wire brushes, you have several options to choose from. For creating textured finishes, a wire brush with stiff bristles is ideal, as it will create deeper grooves and more pronounced patterns. Additionally, consider the shape of the brush head – flat brushes are excellent for creating uniform textures, while angled brushes can be used to achieve more dynamic patterns.
Techniques for Texturing:
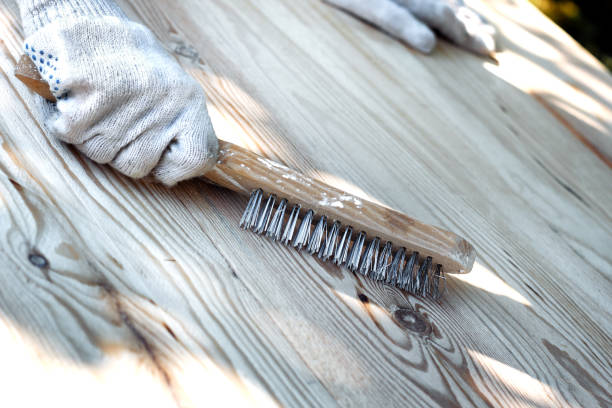
Now that you’ve prepared your wood surface and selected the appropriate brush, it’s time to start texturing. There are several techniques you can use to achieve different effects:
- Parallel Strokes: One of the simplest techniques involves running the wire brush along the grain of the wood in straight, parallel strokes. This creates a linear texture that enhances the natural grain of the wood.
- Cross-Hatching:For a more intricate texture, try using a cross-hatching technique. Start by brushing the wood in one direction, then switch to a perpendicular direction to create a grid-like pattern.
- Circular Motion:Experiment with using circular motions to create a more random, organic texture. This technique works particularly well for creating a weathered or distressed look.
- Controlled Pressure: Adjusting the pressure applied to the brush can also affect the depth and intensity of the texture. Light pressure will create subtle grooves, while heavier pressure will produce more pronounced indentations.
Using a Wooden Wire Brush:
In addition to traditional metal wire brushes, you can also achieve unique textures using a wooden wire brush. These brushes feature bristles made of stiff wooden fibers, which create a softer, more natural texture compared to metal bristles.
To use a wooden wire brush, follow the same basic steps as you would with a metal brush: prepare the wood surface, select the appropriate brush, and experiment with different techniques. However, keep in mind that wooden brushes may require a bit more finesse, as they are less abrasive than their metal counterparts.
Benefits of Using a Wooden Wire Brush:
There are several advantages to using a wooden wire brush for texturing wood surfaces:
- Gentle on the Wood: Wooden bristles are less likely to cause splintering or tearing, making them ideal for delicate or finely finished wood surfaces.
- Natural Aesthetic: The softer texture created by wooden bristles lends itself well to creating a more natural, organic look.
- Versatility: Wooden wire brushes can be used on a variety of materials beyond wood, including leather, fabric, and even metal.
- Eco-Friendly: Unlike metal wire brushes, which can shed metal particles and contribute to pollution, wooden brushes are biodegradable and environmentally friendly.
Tips for Success:
Achieving the perfect textured finish with a wire brush requires practice and patience. Here are a few tips to help you get started:
- Experiment on Scrap Wood:Before applying the technique to your final project, practice on a piece of scrap wood to get a feel for how the brush responds and to experiment with different techniques.
- Work in Sections: Rather than trying to texture the entire surface at once, work in small sections, focusing on achieving the desired texture before moving on to the next area.
- Take Breaks: Wire brushing can be physically demanding, especially on larger projects. Take frequent breaks to rest your hands and prevent fatigue.
- Embrace Imperfections: Remember that the beauty of textured finishes lies in their imperfections. Don’t be afraid to embrace unexpected patterns or variations in texture – they add character to your finished piece.
Conclusion:
Creating c with a wire brush is a simple yet effective way to add depth and personality to your woodworking projects. Whether you’re aiming for a rustic, weathered look or a more refined texture, the versatility of wire brushing allows you to achieve a wide range of effects. By following the techniques outlined in this guide and experimenting with different brushes and methods, you can elevate your woodworking skills to new heights and create truly unique and captivating pieces.