
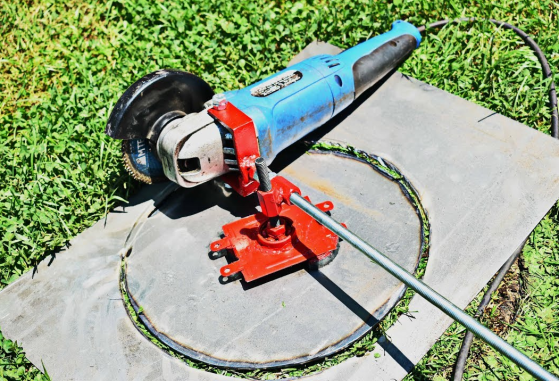
The ability to cut a round hole in various materials, particularly metal, is a valuable skill for many DIY enthusiasts, craftsmen, and professionals alike. While there are multiple tools available for this task, an angle grinder with a metal cutting disc offers a versatile and efficient solution. With the right technique and precautions, an angle grinder can help you achieve clean and precise cuts, allowing you to create round holes for a variety of applications. In this article, we will provide a comprehensive guide on how to cut a round hole with an angle grinder. By following these steps, you’ll be equipped with the knowledge and skills necessary to tackle your projects with confidence.
Tools and Materials Needed
Before you begin, gather the following tools and materials:
- Angle grinder
- Metal cutting disc(suitable for the thickness of the metal you are cutting)
- Safety goggles
- Dust mask or respirator
- Ear protection
- Clamps or vise (optional, for securing the workpiece)
- Pencil or marker
- Ruler or measuring tape
- Work gloves
- Workbench or sturdy surface
How to Cut a round hole with an Angle Grinder
Step 1: Safety Precautions
Safety should always be the top priority when working with power tools. Before starting, put on your safety goggles, dust mask or respirator, and ear protection. Additionally, ensure that you are wearing appropriate work gloves to protect your hands.
Step 2: Marking the Hole
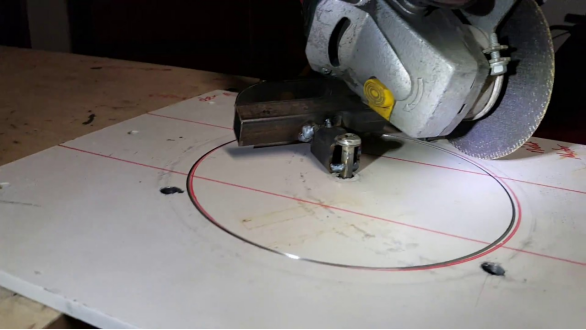
Using a pencil or marker, measure and mark the center of the round hole on the metal surface. You can use a ruler or measuring tape to ensure accuracy. For larger holes, you may want to mark the circumference as well, which will serve as a guide during the cutting process.
Step 3: Securing the Workpiece (Optional)
If your workpiece is small or lightweight, you may need to secure it in place using clamps or a vise. This will prevent it from moving during the cutting process and help you achieve precise cuts. Make sure the workpiece is stable and won’t shift or vibrate during cutting.
Step 4: Choosing the Right Cutting Disc
Select a metal cutting disc suitable for the thickness of the metal you are cutting. Cutting discs come in various sizes and types, so choose one specifically designed for metal cutting. It’s important to use the right disc to ensure optimal cutting performance and safety.
Step 5: Attaching the Cutting Disc
Switch off and unplug the angle grinder before attaching the cutting disc. Follow the manufacturer’s instructions to securely attach the disc to the grinder. Ensure that the disc is tightened properly and centered on the grinder’s spindle.
Step 6: Adjusting the Guard
The angle grinder is equipped with a guard that protects the user from debris and sparks. Before starting the cutting process, adjust the guard to the appropriate position, allowing enough space for the disc to make contact with the metal surface.
Step 7: Cutting the Hole
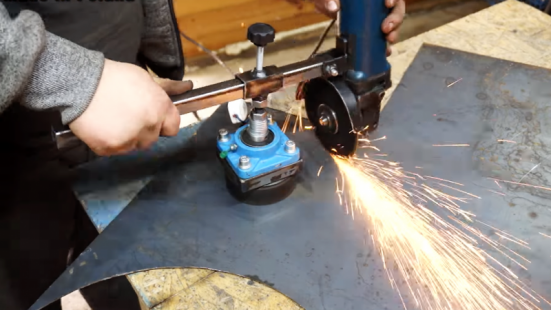
Hold the angle grinder with both hands, firmly gripping the handle and trigger. Position the cutting disc against the marked center of the hole. Slowly lower the spinning disc onto the metal surface, applying gentle and consistent pressure. Allow the cutting disc to do the work and avoid forcing it through the metal.
When cutting, keep the angle grinder at a slight angle (around 5 to 10 degrees) to the surface. This will help prevent the cutting disc from binding or getting stuck in the metal. Move the grinder in a clockwise direction, following the marked circumference for round holes. Take your time and maintain a steady hand for clean and accurate cuts.
Step 8: Cooling and Dust Control
Cutting metal generates heat and produces metal shavings and dust. To prevent overheating, periodically pause the cutting process to allow the metal to cool down. This will also prevent the cutting disc from becoming too hot and potentially causing damage.
Additionally, it is crucial to control the generated dust and metal shavings. Use a vacuum or a wire brush to remove the debris from the work area regularly. Keeping the work area clean will improve visibility and reduce the risk of accidents.
Step 9: Finishing Touches
Once you have completed the round cut, switch off the angle grinder and set it aside. Inspect the cut for any rough edges or burrs. Use a metal file or sandpaper to smooth out any imperfections and create a clean, finished edge.
Conclusion
Cutting a round hole in metal using an angle grinder can be accomplished with precision and accuracy when following the proper technique and using the right tools. Remember to prioritize safety by wearing the necessary protective gear and taking precautions to prevent accidents. By following the step-by-step guide outlined in this article, you can successfully cut round holes in metal using an angle grinder and a metal cutting disc. With practice and attention to detail, you’ll be able to create clean and professional-looking cuts for your various projects.