
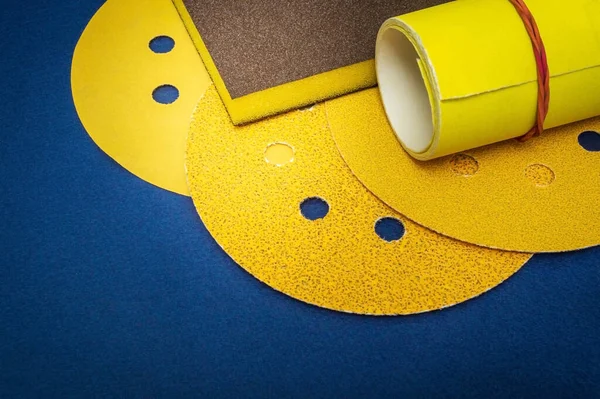
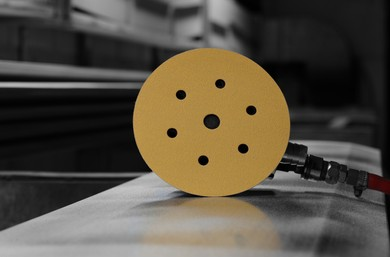
Hook and loop sanding discs have revolutionized the sanding process with their ease of use and versatility. These discs, made of aluminum oxide and equipped with a hook and loop velcro backing, offer a superior grip that prevents slipping during sanding. One of the standout features of hook and loop sanding discs is their ability to be effortlessly attached, removed, and reinstalled multiple times.
In this article, we will delve into the essential steps to properly attach hook and loop sanding discs, ensuring a secure and efficient sanding experience. Additionally, we will explore the various sizes and grit options available, along with the benefits of vacuum holed patterns in reducing dust.
What are Hook and Loop Sanding Discs?
Hook and loop sanding discs are commonly available in the two standard sizes of 5″ and 6″, catering to a wide range of sanding applications. These discs are manufactured using high-quality aluminum oxide, renowned for its durability and excellent abrasive properties. The hook and loop velcro backing provides a reliable and robust attachment mechanism, ensuring that the sanding disc stays firmly in place during operation.
How To Attach Hook and Loop Sanding Discs:
- Prepare the Sander Pad:
Before attaching the sanding disc, ensure that the sander pad is clean and free from any debris or residue from previous use. This will help to establish a strong bond between the pad and the sanding disc.
- Align the Disc:
Hold the sanding disc with the abrasive side facing down and carefully align it with the sander pad. The velcro hooks on the sanding disc should align with the loop surface on the sander pad.
- Press Firmly:
Apply even pressure to the sanding disc, pressing it firmly onto the sander pad. Make sure to distribute the pressure evenly across the entire surface of the disc. This will ensure a secure attachment and prevent any slippage during sanding.
- Test the Attachment:
To confirm that the sanding disc is securely attached, give it a gentle tug or rotate the sander pad slightly. If the disc remains firmly in place, you can proceed with your sanding task.
Removing and Reinstalling Hook and Loop Sanding Discs:
One of the significant advantages of hook and loop sanding discs is their ability to be easily removed and reinstalled. This feature allows for quick grit changes or disc replacements without wasting time or resources.
- Removal Process:
To remove a hook and loop sanding disc, firmly grip the outer edge of the disc and peel it away from the sander pad. Avoid pulling too forcefully, as this can damage the disc or the velcro backing. If the disc is resistant, gently rock it back and forth to loosen the grip before removing.
- Reinstallation Process:
To reinstall a sanding disc, follow the same alignment and attachment steps mentioned earlier. Ensure that the sander pad is clean and free from debris before attaching the new disc. Press the disc firmly onto the pad, applying even pressure for a secure bond.
Exploring Size and Grit Options:
Hook and loop sanding discs are available in various sizes and grit options to accommodate different sanding requirements. The most common sizes are 5″ and 6″, which fit most standard sanders. When selecting the appropriate grit, consider the nature of your project. Coarser grits, such as 40 or 60, are suitable for heavy material removal, while finer grits like 180 or 240 are ideal for achieving smooth finishes or preparing surfaces for painting or staining.
Benefits of Vacuum Holed Patterns:
Some hook and loop sanding discs come with vacuum holed patterns, which offer additional advantages. These patterns allow for efficient dust extraction during sanding, resulting in a cleaner working environment and improved visibility. The holes aid in preventing clogging, enhancing the longevity of the sanding disc and ensuring consistent performance.
Conclusion:
Attaching hook and loop sanding discs is a straightforward process that can significantly enhance the efficiency and effectiveness of your sanding tasks. By following the proper steps, including preparing the sander pad, aligning the disc, and pressing firmly, you can ensure a secure attachment. The ability to remove and reinstall these discs multiple times provides convenience and flexibility. Additionally, considering the size and grit options, as well as the benefits of vacuum holed patterns, will allow you to select the best sanding discs for your projects. With this knowledge in hand, you are now equipped to achieve outstanding results in your sanding endeavors.