
Precautions for Dressing a Grinding Wheel

1. Before starting to dress the bench grinding wheel, be sure to check the grinder and the grinding wheel for cracks by visual inspection and ring test.
2. After confirming that there are no cracks in the grinding wheel and there is no danger, please check the tool holder next.
- It should be as close as possible to the grinding wheel, enough to make it free to run.
- Ideally, leave 1/16 of an inch between the tool holder and the grinding wheel.
- When the grinding wheel wears, you need to adjust the rest and move it closer.
This is important because if you leave a lot of space between the rest and the grinding disc, you can damage the tool and, more importantly, cause serious damage.
That is, the grinding wheel dresser may be caught by the grinding wheel and pulled under the grinding wheel, causing the finger or hand to lift and be injured on the high speed grinding wheel.
3. In addition, turn the grinding wheel by hand just to see if it is firm and not shaking.
4. Many grinders have spark guards designed to prevent sparks from tangling as the grinding wheel rotates and falls on the workpiece or face.
- The spark guard should also be adjusted very close to the grinding disc, which is also ideal for 1/16 of an inch. Take extra care if your grinder does not have a spark shield.
- Some dressing tables, such as the star dressing table, can cause a lot of sparks, so safety glasses (full face protection and safety glasses are the ultimate protection!) are essential protective equipment.
5. Silicon carbide or alumina oxide is the dust you don’t want in your lungs.
- Since even acute silicosis is a serious condition, make sure you buy a high-quality mask that will be used every time you wear it.
- If you want to keep the store or garage clean (you might do this), cover the other machines before you start using other machines to avoid getting the other toll stations and machines covered with wear debris. Keeping the work area clean is also important to reduce the likelihood of injury.
6. Another very important note:
- Do not wear long sleeves when trimming the grinding wheel, as the shirt or jacket may get stuck in it.
- The same applies to long hair (if you have, pull back) and gloves – whether you believe it or not, when working on a grinder (unless you use a longer handle, a grinding wheel dresser glove can be a very dangerous one) Parts are equipped as they can get between the trapped grinding wheel and the tool holder. Be sure to take extra precautions, such as standing next to the grinder instead of turning the grinder in front of the grinding wheel.
 Once you have taken all the necessary precautions and are ready, you can begin.
 Once you have taken all the necessary precautions and are ready, you can begin.
For all of the discussed bench grinding disc dresser types, the process is more or less identical: diamond dressers, trim bars and star trimmers.
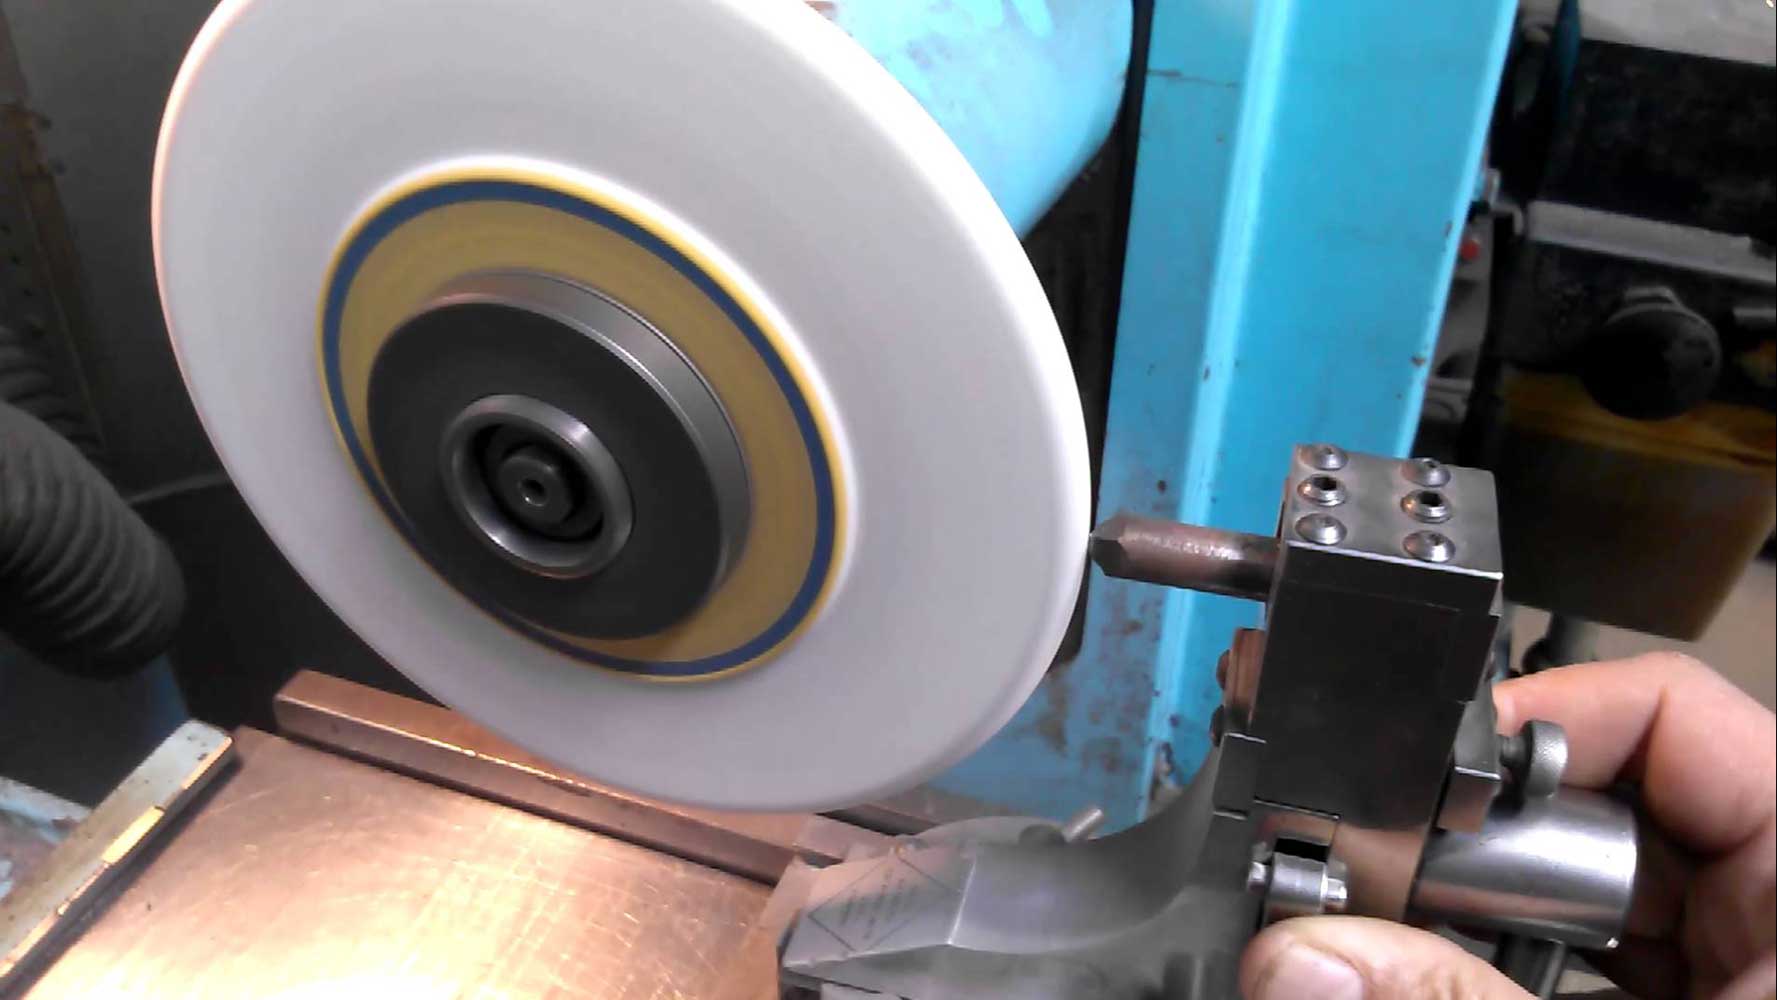
Trimming and trimming is carried out by holding it on the surface of a rotating grinding wheel and moving it back and forth on the grinding wheel surface.
1. Turn on the grinder and let the grinding wheel reach the full RPM.
- Starting from the trimming off center to the end of the grinding wheel.
- If you are using a star dressing table, you will need to place your legs on the rest of the back, apply the head with a grinding wheel or a cutting wheel on the surface of the grinding wheel, and you will run the tool back and forth.
- If you are using a wide-faced diamond dresser, apply the entire surface to the entire surface of the grinding wheel with a slight pressure and move it back and forth a little.
- The trimming bar also rests on the grinding wheel and moves back and forth.
- As a single-point diamond dresser, they are placed in a holder with a point set at an angle of 10 to 15 degrees pointing towards the direction of rotation of the wheel (ensuring that the turning tool maintains a sharp point 20-40 degrees frequently).
2. The entire process of dressing is not labor intensive and takes about five minutes.
- The dressing of the grinding wheel should be just right to establish concentricity or to expose new sharp abrasive particles to the workpiece. The process ends when you have a brand new wheel flat surface.
IMPORTANT: After finishing the dressing, don’t forget to return the tool holder back to the 1/16 inch of the grinding wheel.
Final Thoughts
BINIC- abrasive grinding wheel manufacturers – If you have questions about these products or any abrasives, our sales and technical experts will be happy to help you. You can send a message in the contact form below.