
Welding is an essential skill in various industries, but the process often leaves behind small welds or imperfections that need to be addressed for a flawless finish. In such cases, a versatile and effective tool comes to the rescue – the flap disc. This abrasive powerhouse is specifically designed to remove small welds and smoothen surfaces, providing a professional touch to your welding projects. In this comprehensive guide, we will delve into the art of using flap discs to eliminate small welds, offering insights, tips, and step-by-step instructions for a seamless welding experience.
What are Flap Discs?
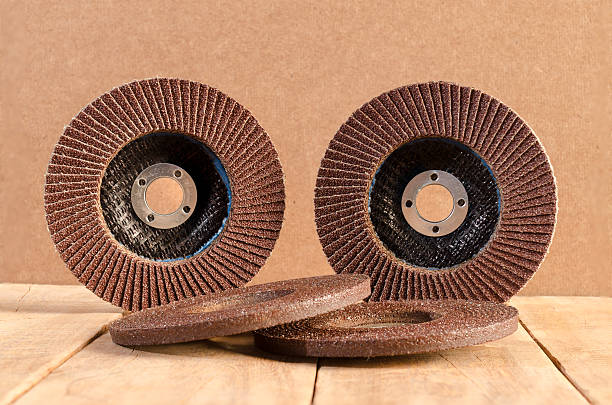
Before we dive into the removal process, let’s take a moment to understand what flap discs are and why they are an excellent choice for removing small welds. Flap discs are abrasive wheels consisting of overlapping, radial flaps. These flaps are made from abrasive-coated, high-quality materials such as aluminum oxide or zirconia alumina. The overlapping design allows for consistent wear, providing a longer lifespan compared to traditional grinding wheels.
Flap discs are available in various grit sizes, ranging from coarse to fine, making them suitable for a wide array of applications. They can be mounted on angle grinders, ensuring easy maneuverability and accessibility to tight spaces. The versatility and efficiency of flap discs make them a preferred choice for welders looking to achieve a smooth and polished finish on their projects.
Choosing the Right Flap Disc
Selecting the appropriate flap disc is crucial for achieving optimal results when removing small welds. Consider the following factors to make an informed decision:
- Grit Size:Flap discs come in different grit sizes, and the right choice depends on the severity of the weld and the desired finish. Coarse grits (40-60) are suitable for aggressive material removal, while finer grits (80-120) provide a smoother finish.
- Material:Flap discs are available in various materials, including aluminum oxide, zirconia alumina, and ceramic alumina. The choice of material depends on the type of metal being worked on. Zirconia alumina, for example, is well-suited for stainless steel, while aluminum oxide is effective for general-purpose use.
- Backing Type:The backing of a flap disc can be fiberglass or plastic. Fiberglass backing is more durable and provides better support, making it ideal for heavy-duty applications.
- Disc Shape:Flap discs are available in various shapes, including flat, conical, and T29 flap disc (angled). The choice of shape depends on the specific requirements of the project and the accessibility of the welding area.
What You Need to Know about Small Welds?
Before mastering the art of removing small welds with flap discs, it’s crucial to understand the different types of small welds, the common materials involved, and the impact these welds can have on the overall project.
A. Types of Small Welds
- Tack Welds:
Tack welds are temporary welds used to hold components in place before the final welding process. Typically applied at intervals along the joint, tack welds provide stability and alignment. While small, they play a crucial role in ensuring the proper assembly of the workpieces.
- Spot Welds:
Spot welding involves joining two metal surfaces at specific points through the application of heat and pressure. This creates a series of small welds, known as spot welds, which are commonly used in automotive and sheet metal applications. Removing spot welds with precision is essential to maintain the integrity of the metal structure.
B. Common Materials Used in Small Welds
Understanding the materials involved in small welds is essential for choosing the right flap disc and ensuring a successful removal process.
- Steel: Commonly used in a variety of industries, steel is a primary material for small welds due to its strength and versatility.
- Stainless Steel: Ideal for applications requiring corrosion resistance, stainless steel is prevalent in industries such as food processing and medical equipment manufacturing.
- Aluminum:Known for its lightweight and corrosion-resistant properties, aluminum is frequently used in small welds, especially in aerospace and automotive applications.
C. Impact of Small Welds on the Overall Project
Small welds may seem inconspicuous, but their impact on the overall project is significant:
- Structural Integrity: Small welds contribute to the structural integrity of the final product. Proper removal ensures that the integrity remains intact, preventing compromise in strength or durability.
- Aesthetics:In projects where appearance matters, the removal of small welds becomes a critical step in achieving a polished and professional finish.
- Quality Control: Small welds are often subject to strict quality control measures. In industries such as aerospace or automotive manufacturing, precision in weld removal is non-negotiable to meet stringent standards.
With a clear understanding of the types of small welds, the materials involved, and their impact on the overall project, let’s proceed to the step-by-step guide on how to effectively remove these welds using flap discs.
Step-by-Step Guide: Removing Small Welds with Flap Discs
Step 1: Safety First
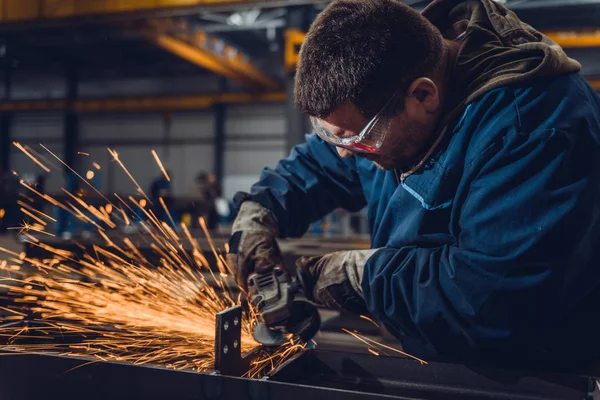
Before starting any welding project, safety should be the top priority. Ensure that you are wearing appropriate personal protective equipment (PPE), including safety glasses, hearing protection, and gloves. Also, make sure the work area is well-ventilated to minimize exposure to welding fumes.
Step 2: Assess the Weld
Examine the weld you intend to remove. Identify the size and depth of the weld to determine the appropriate flap disc grit and material needed for the task.
Step 3: Choose the Right Flap Disc
Refer to the considerations mentioned earlier to select the flap disc that best suits your requirements. For initial weld removal, you have the option of using a Zirconia Alumina flap disc for enhanced material removal or an Aluminum Oxide flap disc for general-purpose applications. Choose based on the type of metal and the aggressiveness needed for the task.
Step 4: Secure the Workpiece
If possible, secure the workpiece in a vise to provide stability during the grinding process. This ensures precise control and minimizes the risk of uneven material removal.
Step 5: Mount the Flap Disc
Attach the chosen flap disc to your angle grinder according to the manufacturer’s instructions. Make sure the grinder is turned off during this process and that the tool is unplugged to prevent accidental activation.
Step 6: Adjust Grinder Speed
Flap discs work best at specific grinder speeds, which are usually indicated on the packaging. Adjust the speed of your angle grinder accordingly to achieve optimal performance and prevent premature wear of the flap disc.
Step 7: Start Grinding
Hold the angle grinder with a firm grip and begin grinding the weld. If using a Zirconia Alumina flap disc, focus on efficient material removal. Maintain a consistent pressure and angle to achieve uniform material removal. Move the flap disc in a controlled manner, covering the entire weld area. Be patient, especially with larger welds, and avoid aggressive grinding, which can lead to excessive heat buildup. If using an Aluminum Oxide flap disc, adopt a similar approach, keeping in mind that this type is suitable for general-purpose applications.
Step 8: Monitor Progress
Periodically stop grinding to assess the progress and ensure that you are achieving the desired result. If necessary, switch to a finer grit flap disc, such as 80 or 120, with the same or different material for a smoother finish.
Step 9: Address Corners and Edges
For small welds in tight spaces, use the edges of the flap disc to reach corners and edges. This requires a steady hand and precise control of the angle grinder.
Step 10: Clean the Workpiece
Once the weld is successfully removed and the surface is smooth, clean the workpiece thoroughly to remove any abrasive residues. This can be done using a wire brush or a compressed air tool.
Step 11: Inspect the Result
Inspect the treated area to ensure that the small welds have been completely removed, and the surface is uniform and free of imperfections. If necessary, make any final adjustments using a polishing flap disc with a high grit size, such as 240 or 320.
Step 12: Fine-Tune and Finish
For an impeccable finish, consider using a polishing flap disc with a high grit size. This step will further refine the surface, leaving it polished and ready for additional finishing touches if required.
Conclusion
Mastering the art of removing small welds with flap discs is an essential skill for any welder seeking precision and professionalism in their projects. By understanding the different types of flap discs, selecting the right one for the job, and following a systematic approach, you can achieve smooth and flawless results. Remember to prioritize safety, use the appropriate personal protective equipment, and take your time to ensure meticulous craftsmanship. With practice and attention to detail, you’ll become adept at using flap discs to transform your welding projects into works of art.