
Plastic is a widely used material known for its versatility in various applications, from crafting to DIY projects and even industrial manufacturing. When it comes to cutting plastic, a Dremel rotary tool can be an invaluable asset. The Dremel, with its precision and adaptability, allows you to make accurate cuts in plastic, facilitating the creation of intricate shapes and designs. In this comprehensive guide, we’ll walk you through the process of cutting plastic with a Dremel, step by step.
How To Cut Plastic With A Dremel?
Step 1: Assemble Your Materials
Before embarking on the cutting process, it’s crucial to gather all the necessary materials and tools. Here’s what you’ll need:
- Dremel Rotary Tool:Opt for a Dremel model that offers adjustable speed settings for enhanced control.
- Cutting Wheel Attachments:Dremel provides a variety of cutting wheel options suitable for different materials. For plastic cutting, consider using a mini cut off wheel designed explicitly for this purpose.
- Safety Gear: Prioritize your safety by wearing safety goggles, a dust mask, and hearing protection. These precautions shield you from potential debris and noise.
- Clamps: If you’re dealing with larger plastic pieces, clamps can help secure the material in place, preventing movement during cutting.
- Marker or Pencil: Utilize a marker or pencil to delineate the area you intend to cut.
Step 2: Select the Appropriate Cutting Wheel
Choosing the correct cutting wheel is a pivotal step toward achieving clean and efficient plastic cuts. Dremel offers various cutting wheel options, each designed for specific materials. However, in this instance, we’ll focus on the use of mini cut off wheels, as these are particularly effective for cutting through plastic. These wheels are available in different sizes and thicknesses, catering to various cutting needs.
Step 3: Prepare the Workspace
Creating an optimal workspace environment is essential. Ensure proper lighting and ventilation to facilitate the cutting process. Additionally, make sure your work surface is stable and provides enough space for your plastic piece. Clear away any obstacles that might hinder your movements.
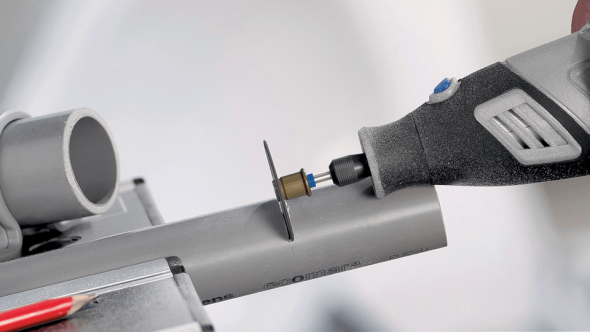
Step 4: Secure the Plastic
For larger plastic pieces, it’s advisable to secure them using clamps. This prevents any unwanted movement during cutting and ensures precise and accurate results, especially if you’re aiming for intricate shapes.
Step 5: Mark the Cutting Line
Before commencing the cutting process, use a marker or pencil to mark the area you intend to cut. This visual guide will assist you in maintaining accuracy throughout the cutting procedure.
Step 6: Put on Safety Equipment
Prioritize safety by donning the appropriate safety gear. Safety goggles safeguard your eyes from debris, a dust mask prevents the inhalation of plastic particles, and hearing protection shields your ears from the noise generated by the Dremel.
Step 7: Attach the Mini Cut Off Wheel
Before attaching the mini cut off wheel to the Dremel, ensure that the tool is turned off and unplugged. Follow the manufacturer’s instructions to securely attach the chosen wheel to the rotary tool, ensuring a snug fit before proceeding.
Step 8: Adjust the Speed Settings
Most Dremel rotary tools offer adjustable speed settings. For plastic cutting, it’s recommended to start at a moderate speed and make adjustments as needed. Higher speeds generate more heat, which can lead to plastic melting instead of clean cutting.
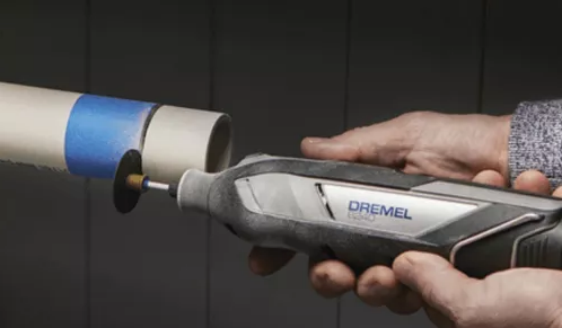
Step 9: Commence Cutting
With your safety gear in place and the Dremel set to the appropriate speed, gently position the mini cut off wheel along the marked cutting line. Begin the cutting process by applying a controlled amount of pressure, allowing the tool to execute the work. Avoid exerting excessive force, as this can cause overheating or uneven cuts.
Step 10: Maintain a Steady Pace
As you cut, ensure a steady and controlled pace. Allow the mini cut off wheel to glide smoothly along the marked line. If you encounter resistance, refrain from forcing the tool; instead, adjust the speed or angle to prevent overheating and potential damage to the plastic.
Step 11: Ensure Cooling Intervals
Maintaining the appropriate temperature is vital to prevent plastic melting. To achieve this, periodically lift the Dremel off the plastic for a few seconds. This pause allows both the mini cut off wheel and the plastic material to cool down, resulting in cleaner cuts.
Step 12: Stay Aligned with the Cutting Line
Maintain alignment with the marked cutting line throughout the process. When working with curves or intricate shapes, exercise patience and make minor adjustments to the tool’s angle to achieve the desired outcome.
Step 13: Complete the Cut
Continue cutting along the marked line until the entire cut is complete. Once finished, turn off the Dremel and place it aside.
Step 14: Sand the Edges
After cutting, you might notice rough or uneven edges on the plastic. Achieve a polished finish by utilizing a sanding attachment on your Dremel or sandpaper. Begin with a coarser grit sandpaper and gradually transition to finer grits for a smooth result.
Step 15: Tidy Up
Clear your workspace of plastic debris and ensure the proper storage of your Dremel and its accessories. Remember to remove your safety gear and wash your hands after handling plastic and tools.
Tips for Successful Plastic Cutting with a Dremel
Practice and Familiarize: If you’re new to cutting plastic with a Dremel, practice on scrap pieces to enhance your proficiency before tackling your main project.
- Prioritize Precision:Cutting plastic with a Dremel necessitates precision and attention to detail. Rushing can lead to inaccuracies or uneven cuts.
- Ideal Speed Setting: Experiment with different speed settings to find the balance between efficient cutting and preventing plastic melting.
- Gentle Pressure: Allow the Dremel to do the work, avoiding excessive pressure that could result in overheating.
- Maintain Cooling:Regular cooling intervals are essential to prevent plastic from melting due to excessive heat.
- Safety Precautions:Always prioritize safety by wearing appropriate gear to safeguard against potential hazards.
Conclusion
Mastering the art of cutting plastic with a Dremel opens up a world of creative possibilities for DIY enthusiasts, crafters, and hobbyists. By following this comprehensive guide and adhering to safety precautions, you’ll gain the skills and confidence needed to achieve precise and clean cuts in plastic materials. Whether you’re crafting intricate designs or fabricating functional prototypes, the Dremel and its mini cut off wheels are valuable tools that can help you realize your creative vision.